
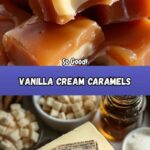
If you adore the warm, buttery sweetness of homemade candy, you are going to fall in love with this Vanilla Cream Caramels Recipe. These luscious, chewy caramels bring together rich notes of brown sugar, creamy vanilla, and a perfect melt-in-your-mouth texture that feels like a little taste of heaven in every bite. Trust me, once you try making these at home, store-bought candy will never be the same again. Whether you want to gift them, share at a gathering, or simply indulge, these caramels are a delightful treat that’s as fun to make as they are delicious to eat.
Ingredients You’ll Need
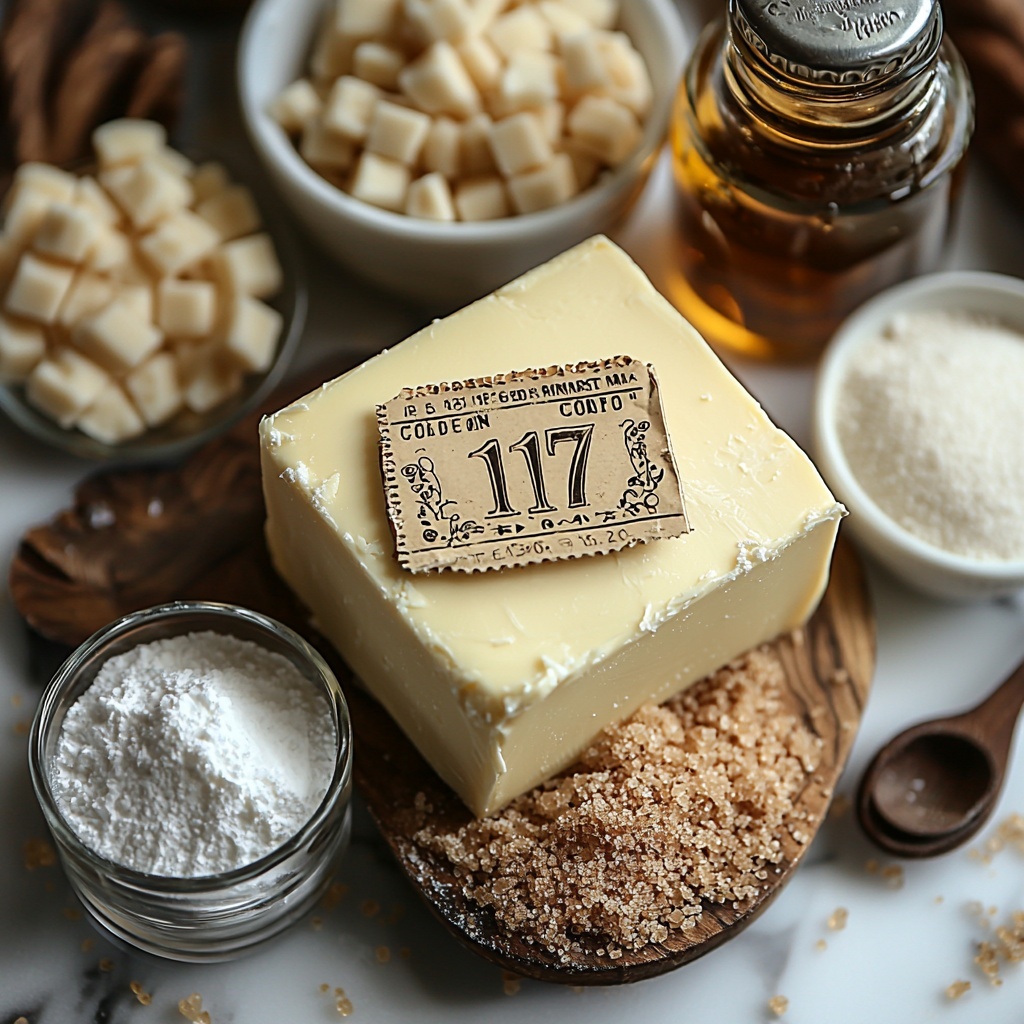
This Vanilla Cream Caramels Recipe calls for simple, pantry-friendly ingredients, each playing a critical role in achieving that perfect chewy texture and deep, creamy flavor. From butter to powdered sugar, every element adds its own magic, ensuring your caramels turn out smooth, rich, and beautifully golden.
- 113 grams unsalted butter: Adds creaminess and richness without overpowering saltiness.
- 340 grams brown sugar: Provides deep molasses flavor and a lovely caramel color.
- 4 grams salt: Enhances sweetness and balances the flavors perfectly.
- 340 grams evaporated milk (1 can): Contributes creaminess and a subtle caramel undertone.
- 170 grams heavy cream: Adds luscious texture and helps keep caramels soft.
- 285 grams corn syrup: Prevents crystallization for smooth, glossy caramel.
- 475 grams powdered sugar: Sweetens and stabilizes the caramel mixture.
- 90 grams vegetable shortening: Keeps caramels pliable and prevents stickiness.
- 75 grams corn syrup (additional): Boosts softness and extend chewiness.
- 2 grams vanilla extract: Delivers that iconic warm vanilla flavor that elevates the entire candy.
How to Make Vanilla Cream Caramels Recipe
Step 1: Prepare Your Pan
Begin by lining a 9×13 inch baking dish with parchment paper. This simple prep step ensures your caramels will release easily once cooled, saving you from a sticky situation when it’s time to slice and share.
Step 2: Combine Butter, Brown Sugar, Salt, and Evaporated Milk
In a heavy-bottomed saucepan, melt together the unsalted butter, brown sugar, salt, and evaporated milk over medium heat. This base mixture creates the foundation of your caramel’s rich flavor. Stir continuously to help the sugar dissolve evenly and avoid any burning.
Step 3: Bring Mixture to the Soft Ball Stage
Let the mixture come to a gentle boil while keeping a close eye with a candy thermometer. When it reaches approximately 240°F (the soft ball stage), it means your caramel is perfectly cooked to develop that chewy texture. Patience here is key—rushing can lead to gritty candy.
Step 4: Add Cream and Corn Syrups, Then Boil Again
Next, stir in the heavy cream along with both portions of corn syrup. Return the mixture to a boil and monitor it once more until it hits 240°F again. This step ensures all the luscious ingredients meld together while maintaining the right consistency.
Step 5: Finish Off with Sugar, Shortening, and Vanilla
Take the pan off the heat, then whisk in the powdered sugar, vegetable shortening, and vanilla extract. This combination smooths out the caramel, infusing it with vanilla aroma and a silky texture that’s irresistible.
Step 6: Pour and Cool
Pour the thick caramel mixture into your prepared dish, spreading it evenly. Allow it to cool completely at room temperature; this wait might be tough, but it’s essential for the caramel to set right. Once firm, cut into about 30 delectable squares and get ready to enjoy!
How to Serve Vanilla Cream Caramels Recipe
Garnishes
While these caramels are incredible on their own, you can dress them up with a light sprinkle of flaky sea salt. The saltiness balances the sweetness perfectly and adds a lovely crunch contrast. For special occasions, try rolling the caramels lightly in cocoa powder or crushed nuts to add texture and extra flavor dimensions.
Side Dishes
Pairing caramels can be surprisingly fun. They go beautifully with a hot cup of coffee or a robust black tea, which help cut through their sweetness. Creamy vanilla or caramel ice cream is also a fantastic sidekick, offering a soft chill against the chewy warmth of these sweet treats.
Creative Ways to Present
Instead of just boxes, consider gifting your Vanilla Cream Caramels Recipe creations in small mason jars adorned with ribbons and personalized tags. You can also wrap individual pieces in wax paper or parchment twisted at each end for a delightful vintage feel. These presentation details make your treats feel as special as their taste.
Make Ahead and Storage
Storing Leftovers
Once your Vanilla Cream Caramels Recipe treats are cut, store them in an airtight container at room temperature. Layer them separated by parchment paper to prevent sticking. Properly stored, they stay tasty and chewy for up to two weeks, making them perfect for prepping ahead of holidays or parties.
Freezing
If you want to make these caramels well in advance, freezing is your friend. Wrap individual pieces tightly in plastic wrap and place in a freezer-safe container. When needed, let them thaw at room temperature for 30 minutes. Freezing maintains their texture and flavor beautifully.
Reheating
Reheating caramels is rarely needed, but if they become too firm, a quick warm-up in your hands or a brief 5-second stint in the microwave can soften them back up without losing that delightful chew.
FAQs
What makes caramels chewy instead of hard?
The key factor is cooking the sugar mixture to the soft ball stage (around 240°F). This temperature ensures the right balance between hardness and chewiness. Ingredients like corn syrup and shortening also help keep the texture soft and pliable.
Can I substitute regular milk for evaporated milk?
Evaporated milk has a more concentrated flavor and creaminess compared to regular milk. Using regular milk might result in a less rich caramel and a different texture, so it’s best to stick to evaporated milk for this recipe.
Why are two types of corn syrup used?
The dual addition of corn syrup prevents sugar crystallization and adds to the elasticity and softness of the caramel. This technique helps create that perfectly smooth and chewy finish.
How long do homemade caramels last?
When stored properly in an airtight container at room temperature, homemade caramels like these will keep their flavor and texture for about two weeks. Longer storage requires freezing to maintain quality.
Can I add other flavors to this Vanilla Cream Caramels Recipe?
Absolutely! While vanilla is classic here, you can experiment with extracts like almond or maple, or even fold in a pinch of sea salt or spices like cinnamon to create your own signature twist.
Final Thoughts
Making these Vanilla Cream Caramels Recipe at home is a rewarding experience that fills your kitchen with the most comforting aromas and your taste buds with pure bliss. Once you master this recipe, you’ll have a go-to sweet treat that’s perfect for gifting, sharing, or treating yourself. So don’t wait—grab those ingredients and start making magic happen in your own kitchen!
Print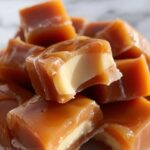
Vanilla Cream Caramels Recipe
- Prep Time: 15 minutes
- Cook Time: 30 minutes
- Total Time: 45 minutes
- Yield: Approximately 30 caramels
- Category: Candy
- Method: Stovetop
- Cuisine: American
Description
These Vanilla Cream Caramels are rich, buttery, and delectably smooth with a luscious vanilla undertone. Perfectly chewy and sweet, they are made by carefully cooking a blend of butter, brown sugar, evaporated milk, corn syrup, and cream to the soft ball stage, then finished with powdered sugar and vegetable shortening to give that classic caramel texture. Ideal for gifting, snacking, or adding a sweet touch to any dessert spread.
Ingredients
Main Ingredients
- 113 grams unsalted butter
- 340 grams brown sugar
- 4 grams salt
- 340 grams evaporated milk (1 can)
- 170 grams heavy cream
- 285 grams corn syrup
- 475 grams powdered sugar
- 90 grams vegetable shortening
- 75 grams corn syrup (additional)
- 2 grams vanilla extract
Instructions
- Prepare the baking dish: Line a 9×13 inch baking dish with parchment paper. This will ensure the caramel mixture does not stick and can be easily removed once cooled.
- Combine base ingredients: In a heavy-bottomed saucepan, melt the unsalted butter with brown sugar, salt, and evaporated milk over medium heat. Stir gently to combine the ingredients evenly without burning.
- Bring to soft ball stage: Bring the mixture to a gentle boil while monitoring the temperature carefully using a candy thermometer. Continue cooking until the mixture reaches approximately 240°F (soft ball stage), which is crucial for the proper caramel texture.
- Add cream and corn syrup: Stir in the heavy cream along with both amounts of corn syrup (285 grams and the additional 75 grams) into the boiling mixture. Continue cooking until the temperature returns to 240°F to ensure the right consistency.
- Finish the caramel mixture: Remove the saucepan from heat. Whisk in the powdered sugar, vegetable shortening, and vanilla extract until the mixture is smooth and homogeneous. This step helps achieve that creamy, classic caramel texture.
- Set and cool: Pour the caramel mixture into the prepared baking dish. Allow it to cool completely at room temperature or in the refrigerator until firm enough to cut into approximately 30 squares.
Notes
- Use a reliable candy thermometer for precise temperature control to avoid overcooking or undercooking.
- Line the baking dish well with parchment paper to prevent sticking and facilitate easy removal.
- Store caramels in an airtight container at room temperature for up to two weeks or refrigerate for longer shelf life.
- Cut caramels with a sharp knife dipped in hot water for clean cuts.
- Vegetable shortening adds creaminess and helps with the chewy texture, do not omit.

