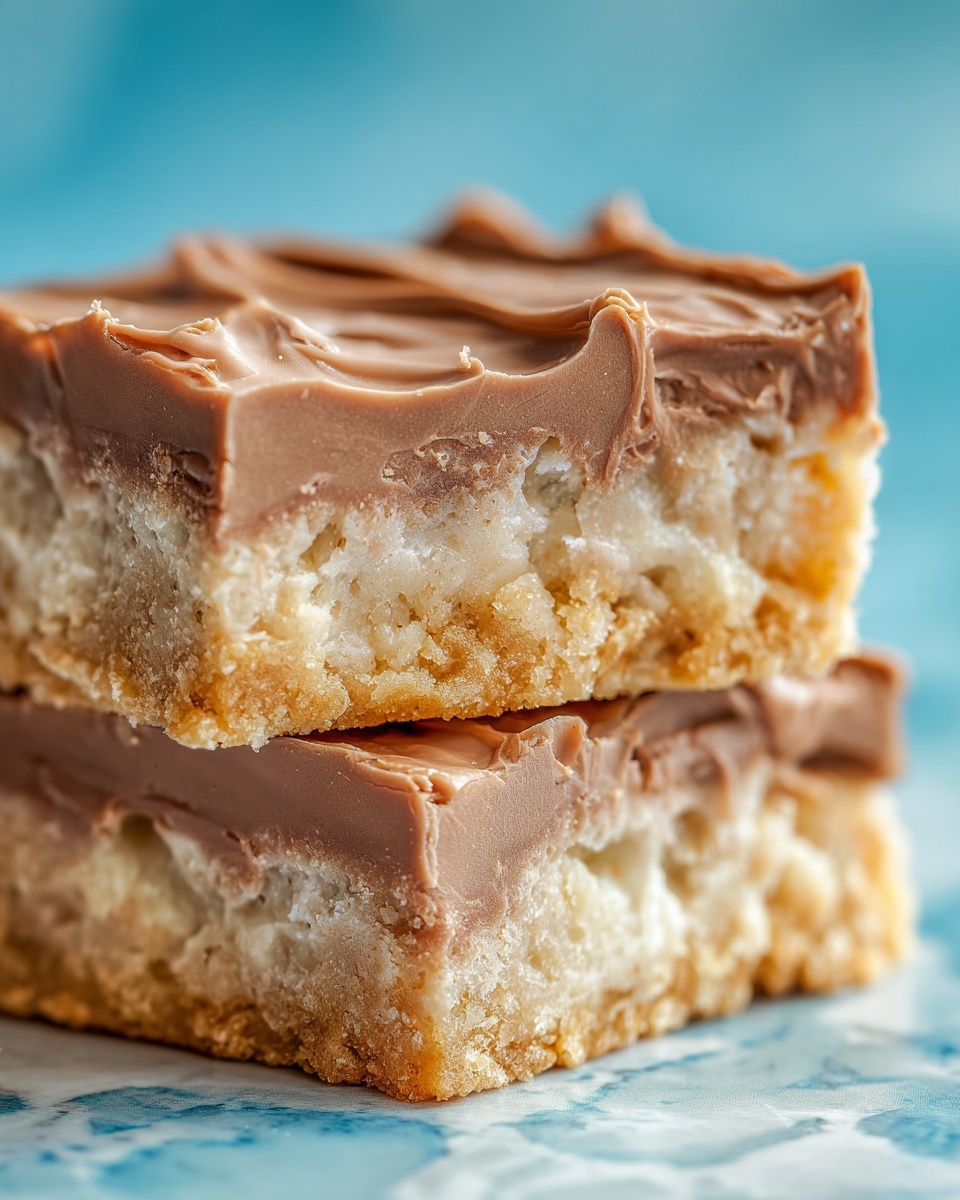
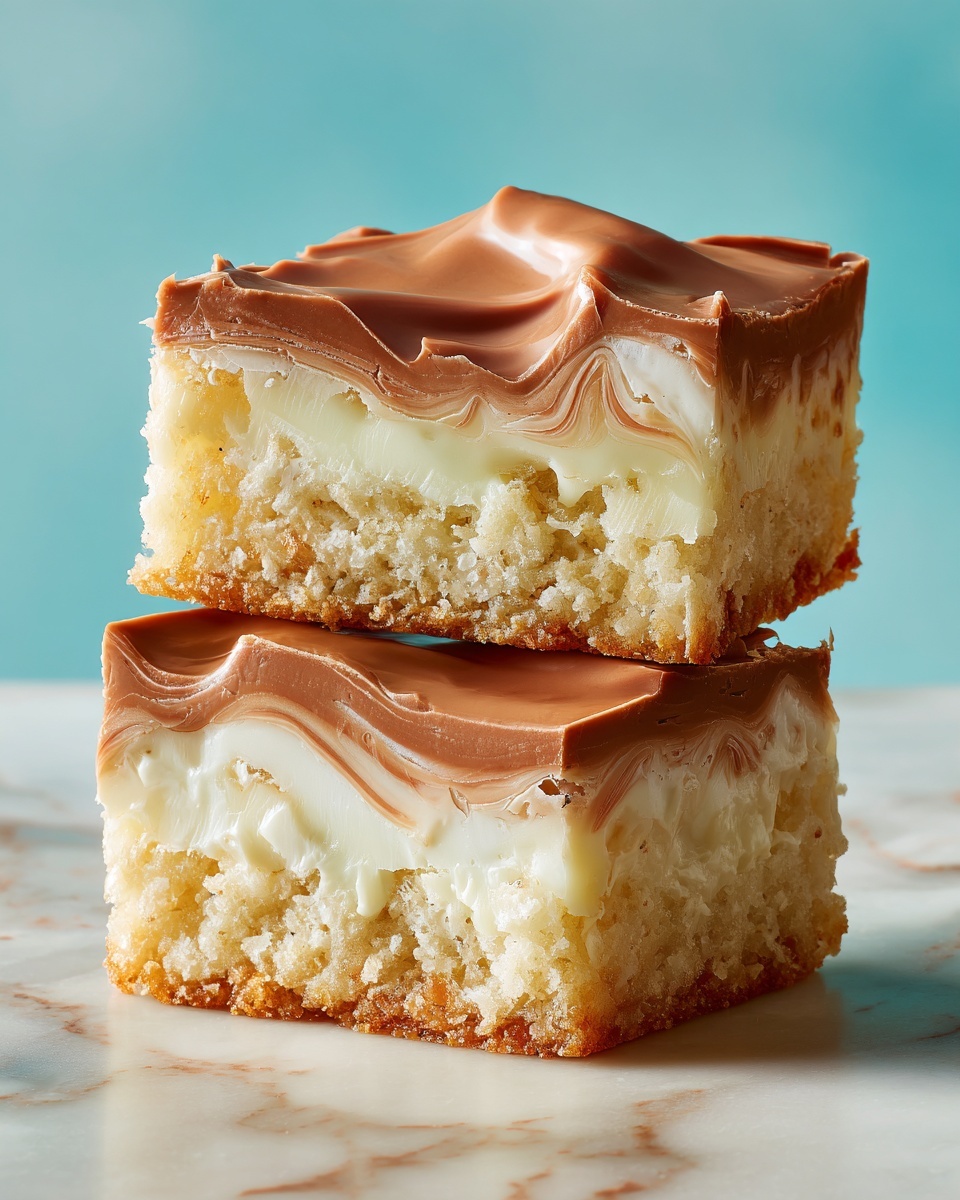
If you have a soft spot for nostalgic treats that pack a punch of flavor, then you are going to adore the Irresistible Disneyland’s Peanut Butter Sandwich Bars Recipe. This luscious combination of crunchy graham crackers, creamy peanut butter, and silky chocolate layers is a total showstopper. It’s the kind of dessert that brings back memories of sweet, carefree days while delighting your taste buds with each bite. Whether you’re serving it at a party or craving a satisfying snack, these bars are pure magic that’s easy to make and impossible to resist.
Ingredients You’ll Need
These straightforward ingredients come together seamlessly to create a delicious texture and balanced flavor profile. Each one plays a careful role—from the graham crackers’ light crunch to the smooth richness of peanut butter and the glossy chocolate topping that seals the deal.
- Graham crackers (1 sleeve, approx. 9 whole crackers): Provides a crisp, slightly sweet base and middle layer for perfect sandwich bars.
- Creamy peanut butter (1 cup): Adds irresistibly smooth richness and a classic peanut flavor that’s key to the recipe.
- Unsalted butter, melted (½ cup): Enhances creaminess and binds the filling together for an indulgent mouthfeel.
- Powdered sugar (1½ cups): Sweetens and thickens the peanut butter mixture, ensuring it holds firm.
- Vanilla extract (1 teaspoon): Lifts the flavors, giving a subtle aromatic warmth that complements the peanut butter perfectly.
- Salt (¼ teaspoon): Balances the sweetness to enhance every bite.
- Semi-sweet chocolate chips (1½ cups): Creates a luscious, melty chocolate top layer with just the right amount of sweetness.
- Peanut butter (2 tablespoons): Mixed into the melted chocolate for a soft, creamy finish on top.
How to Make Irresistible Disneyland’s Peanut Butter Sandwich Bars Recipe
Step 1: Prep Your Pan
Start by lining an 8×8 or 9×9-inch baking pan with parchment paper. Leave some overhang on the sides to make it easy to lift the bars out in one perfect slab once they’re set. This simple step ensures easy cleanup and foolproof slicing later on.
Step 2: Form the Base
Place whole graham crackers in a single layer at the bottom of the pan, breaking them gently if needed to cover every inch of the base snugly. This cracker foundation forms the crisp, sturdy layer that will hold up the luscious fillings.
Step 3: Mix the Peanut Butter Filling
In a medium bowl, whisk together the melted butter, creamy peanut butter, powdered sugar, vanilla extract, and salt until the mixture is totally smooth and thick. This rich filling is the star of the show, delivering that signature creamy peanut butter punch with a touch of sweetness.
Step 4: Spread the Peanut Butter Layer
Pour this thick filling over your graham cracker base and spread it evenly with a spatula. Having an even layer here is crucial for that perfect peanut butter bite in every bar.
Step 5: Add the Second Graham Cracker Layer
Next, gently place another full layer of graham crackers on top of the peanut butter mixture. Press down lightly to help everything stick together without breaking the crackers. This sandwich effect is what makes the bars so satisfying and uniquely textured.
Step 6: Create the Chocolate Top
Melt the semi-sweet chocolate chips with 2 tablespoons of peanut butter in a microwave-safe bowl, heating in 30-second intervals and stirring until silky smooth. Pour this heavenly chocolate over the top graham layer, spreading it evenly for that perfect glossy finish that sets soft and melt-in-your-mouth delicious.
Step 7: Chill and Set
Refrigerate the entire pan for at least 1 to 2 hours, allowing the chocolate to harden and the bars to firm up. This step ensures your bars slice cleanly and the flavors meld beautifully.
Step 8: Slice and Serve
Use the parchment paper overhang to lift the bars from the pan, then cut into squares or rectangles with a sharp knife. Serve these delightfully rich bars chilled or at room temperature for the ultimate snack or dessert experience.
How to Serve Irresistible Disneyland’s Peanut Butter Sandwich Bars Recipe
Garnishes
A simple dusting of powdered sugar or a sprinkle of crushed peanuts on top adds extra charm and texture without overwhelming the classic flavors. For a festive touch, try decorating with mini chocolate chips or a drizzle of caramel sauce for an indulgent twist.
Side Dishes
These peanut butter sandwich bars are fantastic alongside a cold glass of milk or a scoop of vanilla ice cream. For gatherings, serve them with fresh fruit like sliced bananas or strawberries to balance the richness with a fresh, juicy contrast.
Creative Ways to Present
Try stacking the bars as mini sandwich towers tied with a colorful ribbon for parties or gift-giving. Alternatively, cut them into fun shapes with cookie cutters or layer them into dessert parfaits with whipped cream and chocolate shavings for an eye-catching treat.
Make Ahead and Storage
Storing Leftovers
Keep your leftover bars fresh by storing them in an airtight container in the refrigerator. They maintain their taste and texture beautifully for up to 5 days, making them perfect for prepping ahead or enjoying throughout the week.
Freezing
If you want to save these bars for later, wrap them tightly in plastic wrap and place inside a freezer-safe bag or container. Frozen bars can last up to 3 months, and thawing them overnight in the fridge preserves their delectable consistency.
Reheating
Since these bars are best enjoyed chilled or at room temperature, reheating isn’t usually necessary. However, if you prefer a slightly softened chocolate topping, a brief 10-15 second zap in the microwave will do the trick without melting the entire bar.
FAQs
Can I use crunchy peanut butter instead of creamy?
Absolutely! Using crunchy peanut butter will add a delightful texture to the filling, giving each bite an extra nutty crunch. Just be sure to mix well so the filling stays cohesive.
What can I substitute for graham crackers?
If you don’t have graham crackers on hand, digestive biscuits or even vanilla wafers can work as a base and middle layer. They might change the flavor slightly but will still create that lovely crunch and structure.
Is it possible to make these bars gluten-free?
Yes, simply use gluten-free graham crackers or similar gluten-free cookies. The rest of the ingredients are naturally gluten-free, so this recipe adapts well for those avoiding gluten.
How long do these bars last at room temperature?
Since these bars contain dairy and peanut butter, it’s best not to leave them out at room temperature for more than 2 hours. Keeping them chilled preserves their flavor and texture and keeps them safe to eat.
Can I double the recipe for a larger batch?
Definitely! Just double all the ingredients and use a larger pan like a 9×13-inch for even layering. Adjust chilling time as needed to ensure everything sets properly.
Final Thoughts
There’s something truly comforting about the Irresistible Disneyland’s Peanut Butter Sandwich Bars Recipe that feels like a warm hug wrapped in layers of chocolate and peanut butter. The simplicity, nostalgic appeal, and rich flavor make it a standout treat you’ll want to make again and again. So go ahead, gather your ingredients, and whip up a batch today — your taste buds will thank you!