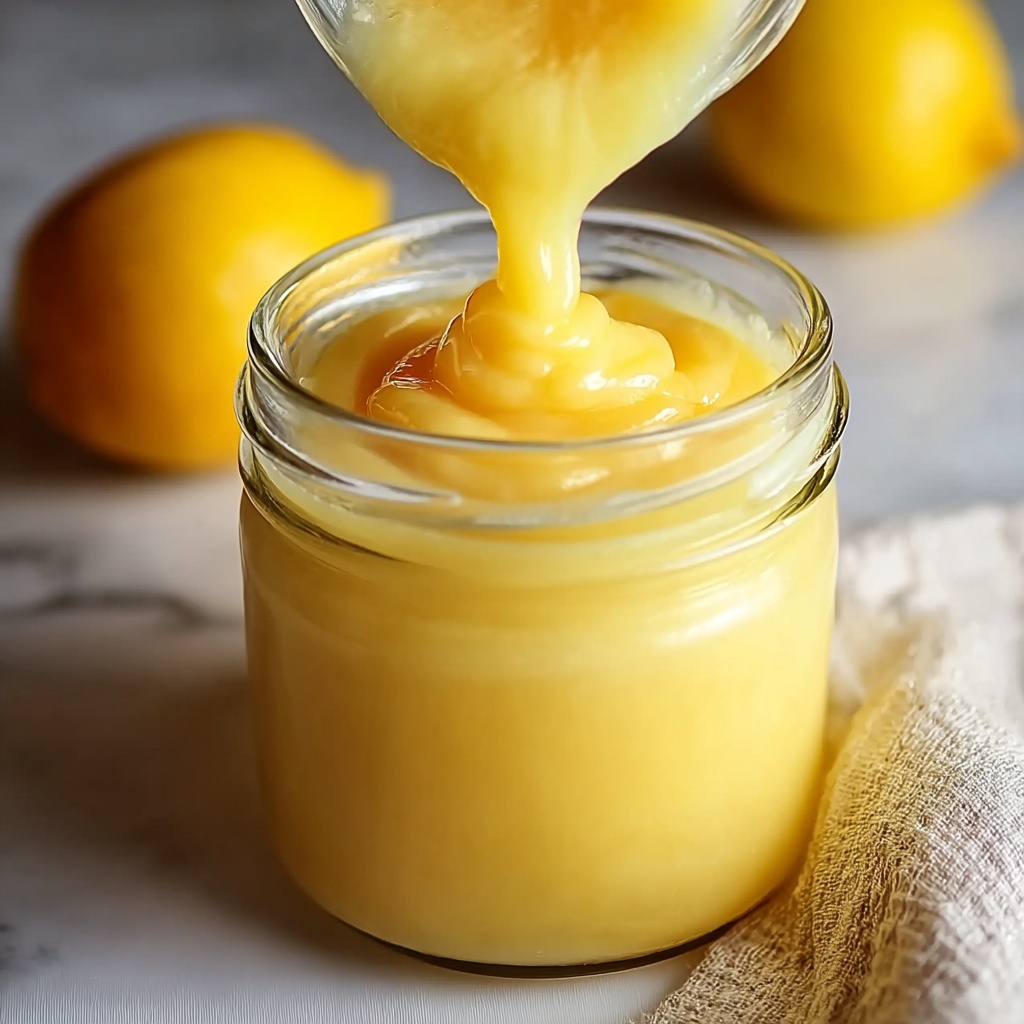
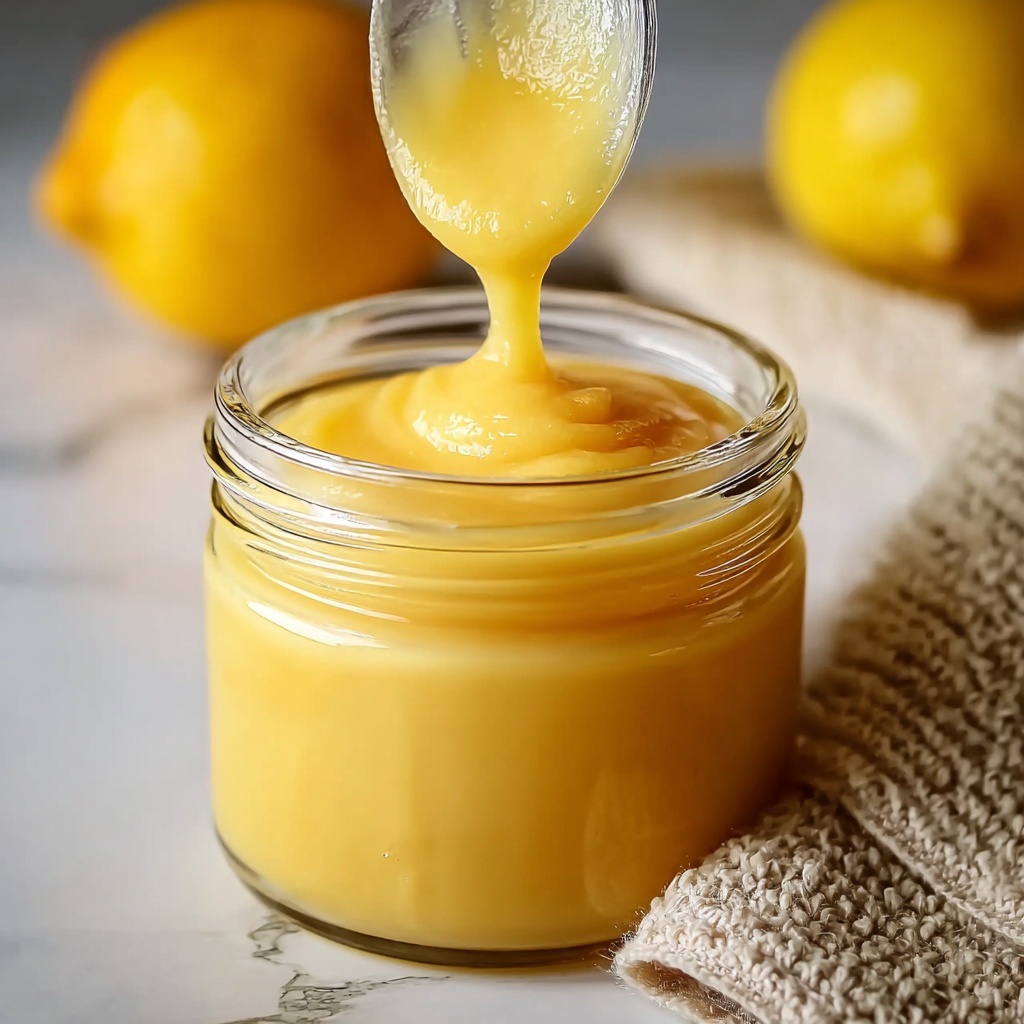
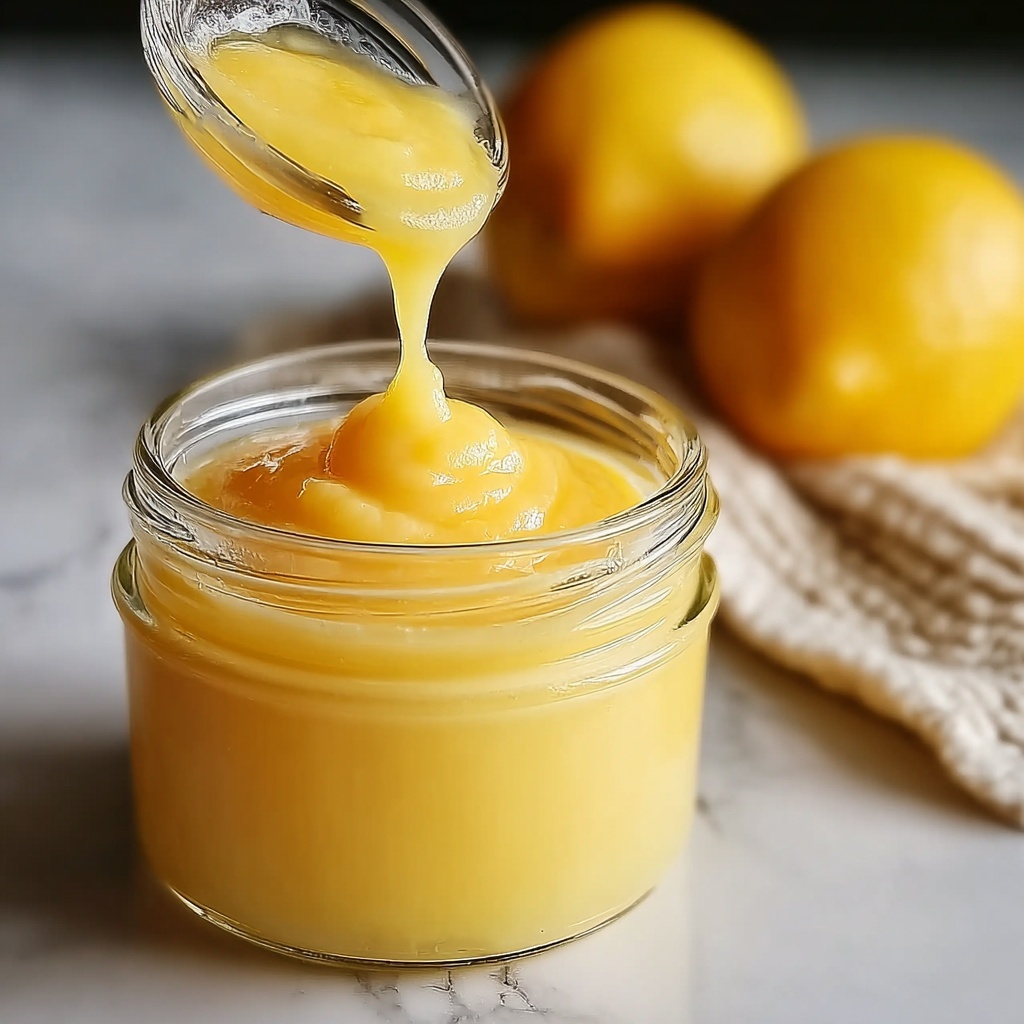
If you have a love for tangy, buttery spreads that brighten up any breakfast or dessert, you are going to absolutely adore learning How to Make Lemon Curd Recipe. This luscious, silky lemon curd is the perfect balance of sweet and tart, with a creamy texture that melts in your mouth. Whether spread on toast, dolloped onto scones, or swirled into yogurt, this homemade lemon curd elevates everyday dishes with its sunny flavor and fresh citrus zing. Trust me, once you master this recipe, you’ll wonder how you ever lived without your own jar of lemon sunshine in the fridge!
Ingredients You’ll Need
The beauty of this recipe lies in its simplicity. Just a handful of simple ingredients come together to create something magical — every element plays a vital role, from the tart brightness of fresh lemon juice to the richness of eggs and butter that give the curd its signature smoothness.
- Granulated sugar: Provides the perfect sweetness to balance the lemon’s natural tartness.
- Cornstarch: Acts as a gentle thickener, ensuring the curd sets beautifully without any graininess.
- Salt: Enhances the flavors and keeps everything vibrant.
- Fresh lemon juice: The star ingredient delivering that fresh, zesty pop; about 5 lemons will do the trick.
- Large eggs: Bring richness and help thicken the curd for that silky texture.
- Unsalted butter: Adds a creamy, smooth finish and rounds out the flavors.
- Grated lemon rind: Boosts the citrus aroma and adds a subtle depth to each bite.
How to Make How to Make Lemon Curd Recipe
Step 1: Combine Dry Ingredients
Start by whisking together the granulated sugar, cornstarch, and salt in a medium saucepan. This ensures an even distribution before adding the wet ingredients, which is crucial for a smooth lemon curd without lumps.
Step 2: Add Lemons and Eggs
Next, stir in the fresh lemon juice and the eggs. Whisk thoroughly until everything forms a uniform mixture. This step melds the tangy and rich flavors before heating.
Step 3: Heat and Stir Constantly
Place the saucepan over medium heat. You need to stir continuously to prevent the eggs from curdling and to evenly cook the mixture. Keep this up until it reaches a gentle boil, which is the sign that your curd is thickening beautifully.
Step 4: Simmer to Thicken
Once boiling, reduce the heat slightly. Continue simmering for about one minute while stirring constantly. This brief simmer is the secret to achieving the perfect velvety thickness in the lemon curd.
Step 5: Add Butter and Zest
Remove the saucepan from the heat and immediately stir in the butter and grated lemon rind. The butter melts into the hot curd, enriching it with creamy goodness, while the zest intensifies the lemony aroma.
Step 6: Cool and Chill
Transfer your luscious lemon curd into a bowl and let it cool to room temperature. After cooling, refrigerate it for at least six hours or overnight. This chilling step allows the flavors to deepen and the curd to firm up perfectly.
How to Serve How to Make Lemon Curd Recipe
Garnishes
Sprinkle a bit of fresh lemon zest or finely grated white chocolate on top of your lemon curd to elevate its appearance and add an extra pop of flavor. Some fresh mint leaves also pair wonderfully, balancing the tartness with a refreshing herbal note.
Side Dishes
Serve your lemon curd alongside freshly baked scones, warm croissants, or buttery toast for a classic treat. It also pairs beautifully with simple shortbread cookies or as a vibrant topping for vanilla ice cream.
Creative Ways to Present
Why not swirl it into Greek yogurt or spread it over pancakes for a bright morning boost? Lemon curd also makes an incredible filling for cakes, tarts, and cupcakes — your desserts will instantly sparkle with homemade charm and flavor.
Make Ahead and Storage
Storing Leftovers
Homemade lemon curd keeps well when stored in an airtight container in the refrigerator. It will stay fresh and delicious for around one week, making it perfect to prepare in advance and enjoy throughout the week.
Freezing
You can freeze lemon curd for longer storage. Just make sure to use a freezer-safe jar or container, leaving some headspace for expansion. When you’re ready to use it, thaw the curd overnight in the refrigerator.
Reheating
If you like your lemon curd a little warm, gently reheat it in a saucepan over low heat, stirring constantly until it loosens to your desired consistency. Avoid boiling or overheating to prevent the eggs from scrambling.
FAQs
Can I use bottled lemon juice instead of fresh lemons?
While bottled lemon juice can work in a pinch, fresh lemon juice gives your curd a brighter, fresher flavor that’s tough to beat. The natural oils in fresh lemon rind also enhance the taste beautifully.
Is it safe to eat lemon curd with raw eggs?
This recipe involves cooking the mixture until it boils, which means the eggs are cooked through and safe to eat. Just keep stirring constantly to avoid curdling for the best texture.
Why is my lemon curd too runny?
If your curd is runny, it might not have cooked long enough to thicken properly. Make sure to simmer for the full recommended time and stir continuously. Also, check your cornstarch measurement as it is key for thickening.
Can I make lemon curd without cornstarch?
Cornstarch helps set the lemon curd with a smooth consistency. Without it, the curd may be thinner and less stable. However, you can experiment with a cooked custard method using eggs alone if you want a different texture.
How long does homemade lemon curd last?
When refrigerated properly in an airtight container, your homemade lemon curd should stay fresh for about a week. It’s best enjoyed within this time frame to savor its peak flavor and texture.
Final Thoughts
Once you’ve discovered How to Make Lemon Curd Recipe, you’re in for a delightful journey of citrusy bliss. It’s a small daily luxury that brightens breakfasts, snacks, and desserts with its joyful flavor. So don’t hesitate — grab some lemons and make a batch today. Your taste buds will thank you every single time.
Print
How to Make Lemon Curd Recipe
- Prep Time: 10 minutes
- Cook Time: 8 minutes
- Total Time: 18 minutes plus chilling time
- Yield: Approximately 12 servings
- Category: Dessert Sauce
- Method: Stovetop
- Cuisine: British
Description
This classic homemade lemon curd recipe yields a smooth, tangy, and sweet spread perfect for adding a burst of citrus flavor to your desserts, toast, or pastries. Made with fresh lemon juice, eggs, sugar, and butter, it is cooked gently on the stovetop until thickened to a luscious consistency.
Ingredients
Ingredients
- 1 cup + 2 tablespoons granulated sugar
- 1 tablespoon cornstarch
- 1/8 teaspoon salt
- 1 cup fresh lemon juice (approximately 5 lemons)
- 3 large eggs
- 2 tablespoons unsalted butter
- 1 teaspoon grated lemon rind
Instructions
- Combine dry ingredients: In a medium saucepan, whisk together the granulated sugar, cornstarch, and salt until well blended to ensure the curd thickens evenly.
- Add wet ingredients: Stir in the fresh lemon juice and eggs, mixing thoroughly to create a uniform lemon curd base.
- Cook mixture: Place the saucepan over medium heat and continuously stir the mixture to prevent curdling and burning until it comes to a gentle boil.
- Simmer to thicken: Once boiling, reduce the heat slightly and simmer for about one minute while stirring constantly until the curd thickens to a custard-like consistency.
- Incorporate butter and rind: Remove the saucepan from heat, then add the unsalted butter and grated lemon rind. Stir until the butter is fully melted and incorporated for a creamy texture and enhanced lemon flavor.
- Cool and chill: Transfer the lemon curd to a bowl and let it cool to room temperature. Then refrigerate for at least six hours or overnight to set the curd fully before serving.
Notes
- Use fresh lemon juice for the best flavor and bright citrus notes.
- Constant stirring during cooking is essential to avoid lumps and curdled eggs.
- Store leftover lemon curd in an airtight container in the refrigerator for up to one week.
- To make a thicker curd, extend the simmering time by an additional minute or two, but be careful not to overcook.


