If you have a soft spot for traditional teatime treats, you are absolutely going to adore this Homemade Classic Strawberry Scones with Cream and Jam Recipe. Imagine tender, flaky scones bursting with fresh strawberry sweetness, paired with luscious cream and your favorite jam—pure comfort on a plate. These scones are wonderfully easy to make and bring a delightful, homemade charm that elevates any afternoon gathering or quiet moment of indulgence. I can’t wait to take you through every step so you can create these little delights right in your kitchen.
Ingredients You’ll Need
These ingredients might seem simple, but each one plays a crucial role in bringing the perfect texture, flavor, and freshness to your scones. From the buttery richness to the fresh cream, every component is thoughtfully chosen to make your scones sing.
- Self-raising flour (3 cups / 450g): This gives the scones their light, tender lift without extra fuss.
- Cold salted butter (80g / 3 oz, cubed): Keeping the butter chilled ensures amazing flakiness and richness.
- Milk (1 cup / 250 ml, fridge cold): The coldness helps bring the dough together gently without melting the butter too soon.
- Extra flour (for dusting): Helps keep your work surface and cutter clean for neat scones.
- Extra milk (for brushing): Adds a lovely golden sheen to the tops of your scones.
- Strawberry jam: Classic sweetness that pairs perfectly with the scones and cream.
- Whipping cream (250 ml / 1 cup): Whipped and lightly sweetened, it adds that rich, luxurious finish.
- White sugar (1 tbsp): To sweeten the cream just slightly for balance.
- Vanilla extract (½ tsp, optional): A subtle fragrant note that takes the cream from good to unforgettable.
How to Make Homemade Classic Strawberry Scones with Cream and Jam Recipe
Step 1: Preheat and Prep
Get your oven warmed up to 200°C (390°F standard, or 180°C / 350°F fan/convection). Warming the oven first ensures the scones start baking right away, helping them rise beautifully and get that perfect golden crust.
Step 2: Create the Crumbly Base
Into your food processor, add the self-raising flour and cold cubed butter. Blitz these together on high for about 8 seconds until the mixture looks like fine breadcrumbs. This step is where the magic starts—with cold butter creating those little pockets of flakiness we all crave.
Step 3: Bring the Dough Together
Pour the cold milk over your breadcrumb mixture evenly—not just in one spot—and blitz again for 6 to 8 seconds. Watch for the crumbs to turn into a soft dough ball. This method keeps things light and tender without overworking the flour.
Step 4: Gentle Kneading
Transfer your dough onto a lightly floured surface and scrape out the bits left in the processor. Now, knead the dough gently no more than 10 times—just enough to bring it into a smooth ball. Over-kneading can make scones tough, so keep it light and loving.
Step 5: Shape and Cut
Pat your dough into a disc roughly 2 cm (around ¾ of an inch) thick. If you want, gently roll over the top to smooth it out. Dip your 5 cm (2 inch) round cutter in flour and plunge straight down into the dough—no twisting! Carefully lift out each scone and place onto your baking tray. Be gentle not to squash the edges for the best rise.
Step 6: Bake to Perfection
Brush the tops lightly with milk to give a golden hue, then pop the tray into your preheated oven. Bake for 10 to 12 minutes until your scones are golden brown on top and sound hollow when gently tapped underneath—a simple test for just-right bake.
Step 7: Keep Them Soft and Warm
Once baked, transfer the scones onto a clean dish towel and wrap loosely to trap just the right amount of warmth and moisture. This keeps the tops soft and irresistible while they cool to a perfect warm temperature.
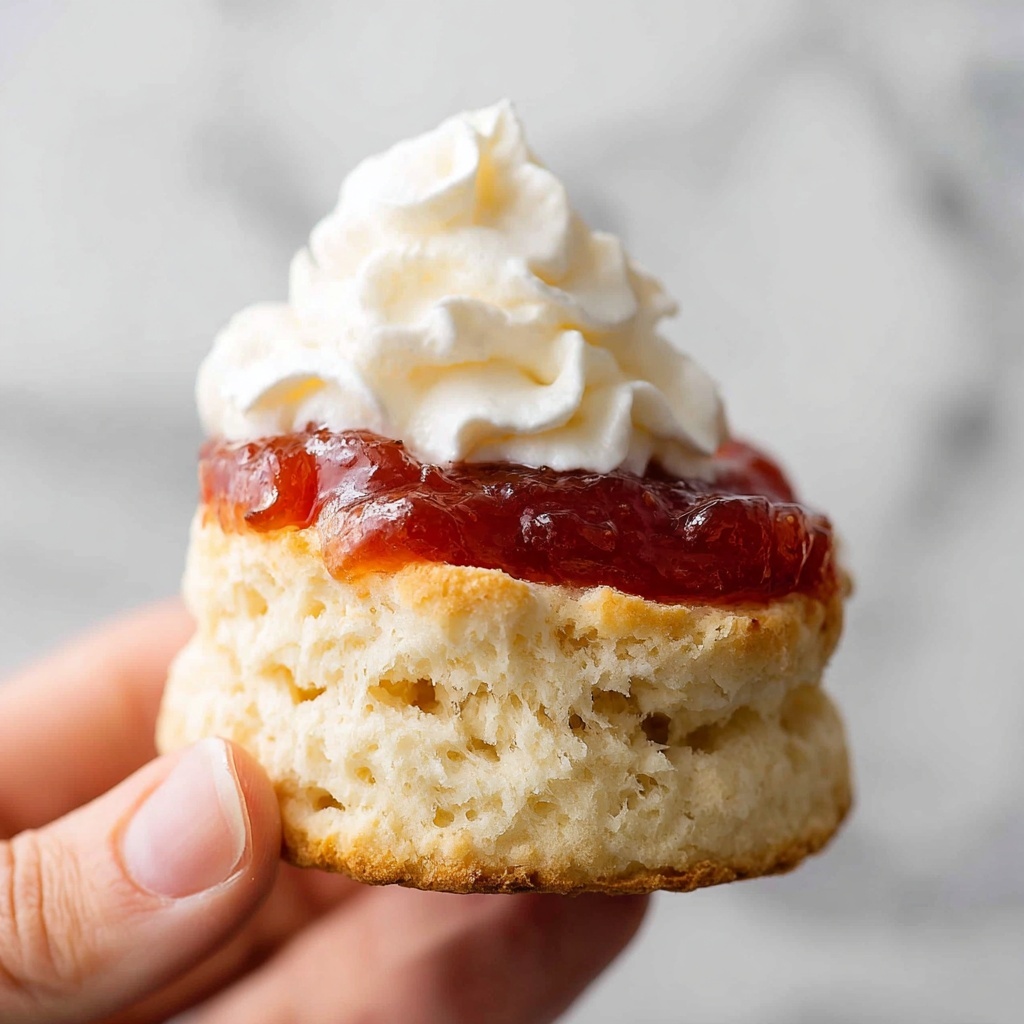
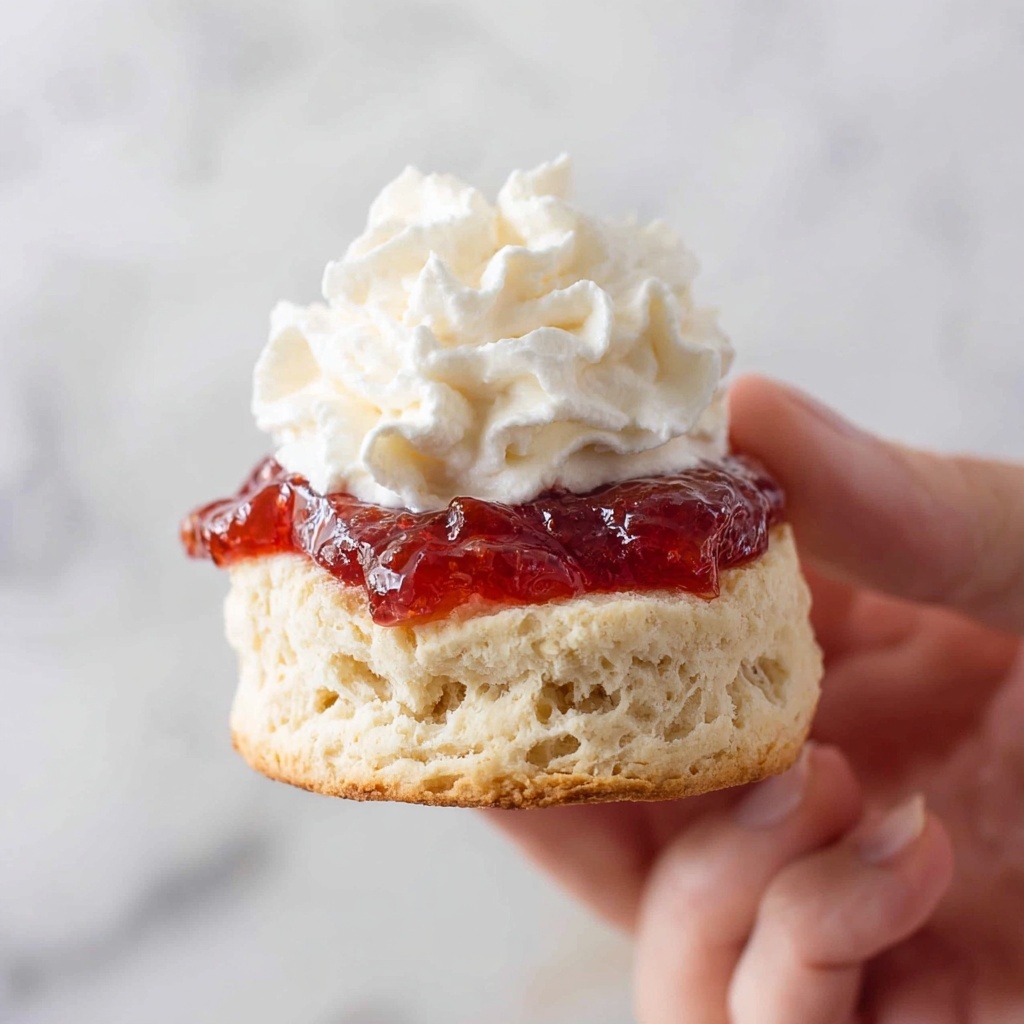
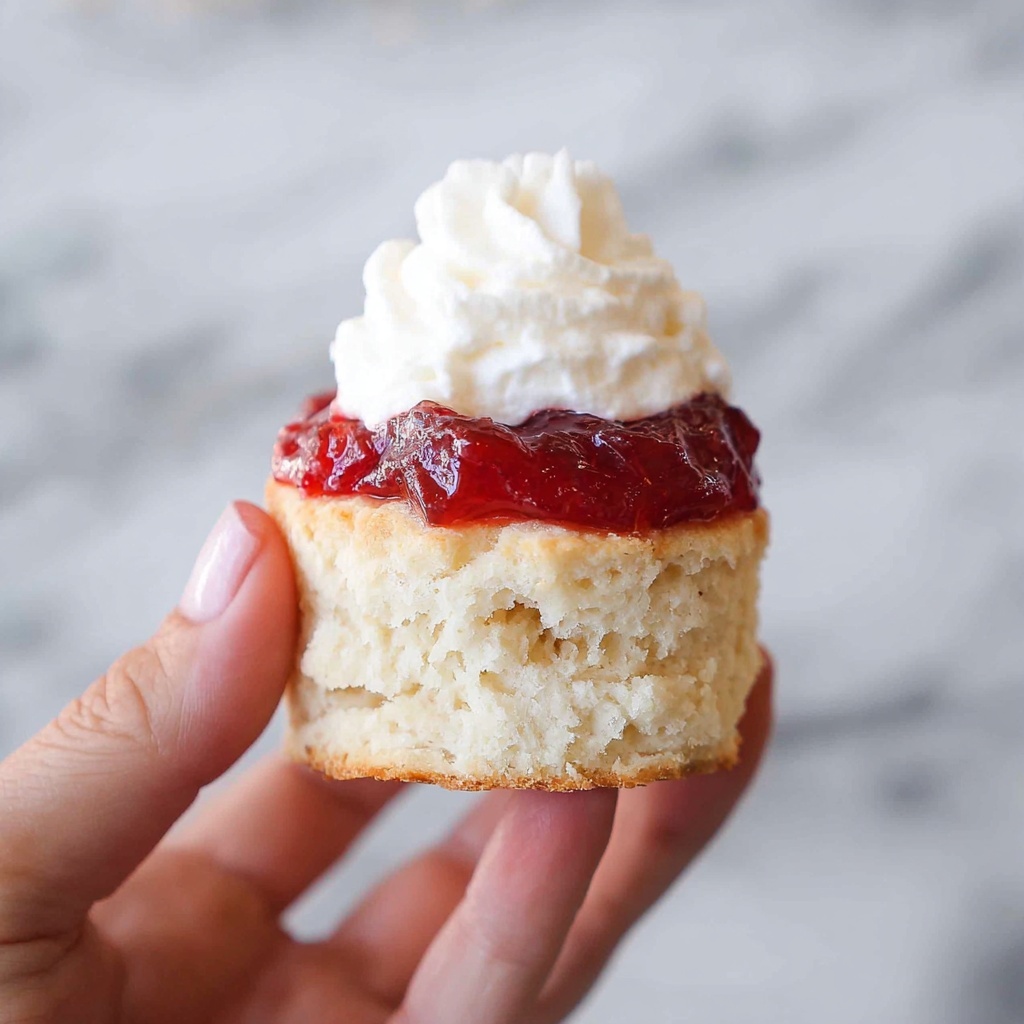
Step 8: The Best Part—Serving
When ready to eat, split the scones by hand (never use a knife—it ruins the texture!) and slather generously with strawberry jam and cream. This final flourish is what turns homemade scones into everyday magic.
How to Serve Homemade Classic Strawberry Scones with Cream and Jam Recipe
Garnishes
Fresh strawberries sliced on the side add a vibrant pop of color and extra juiciness that complements the strawberry jam beautifully. A sprig of mint can add a surprising refreshing twist if you want to get fancy.
Side Dishes
Keep it simple with a pot of your favorite tea or freshly brewed coffee. For a more indulgent experience, a small bowl of mixed berries or a light fruit salad can round out your treat perfectly.
Creative Ways to Present
Serve the scones on a rustic wooden board with small bowls of cream and jam so everyone can dollop exactly how they like. Alternatively, stack a few scones with layers of cream and jam for a fun scone trifle twist that’s sure to wow your guests.
Make Ahead and Storage
Storing Leftovers
If you’re lucky enough to have leftovers, store them in an airtight container at room temperature for up to two days. To keep the scones tender, wrap them in a clean kitchen towel before sealing.
Freezing
For longer storage, you can freeze unbaked scones arranged on a tray in the freezer. Once frozen solid, transfer them to a freezer-safe bag and bake from frozen, just adding a couple of minutes to the baking time.
Reheating
Reheat scones gently in a warm oven (around 160°C or 320°F) for 5 to 7 minutes until warmed through. This helps restore their fresh-baked texture way better than a microwave ever could.
FAQs
Can I use frozen strawberries in this Homemade Classic Strawberry Scones with Cream and Jam Recipe?
While fresh strawberries provide the best texture and flavor, you can use thawed frozen strawberries if needed. Just be sure to drain any excess juice well so your dough doesn’t get too wet.
Is it possible to make these scones dairy-free?
Absolutely! Swap the butter for a cold dairy-free margarine and use a plant-based milk like almond or oat milk. The texture will be slightly different but still delicious.
How do I know when the scones are perfectly baked?
Look for a golden-brown top and bottoms that sound hollow when tapped. This indicates they’re cooked through and delightfully fluffy inside.
Can I add other fruits to this recipe?
Yes! Blueberries, raspberries, or chopped fresh peaches can be lovely alternatives or additions to the strawberry jam for different flavor experiences.
Why shouldn’t I twist the cutter when cutting the scones?
Twisting seals the edges, which can prevent the scones from rising properly and create dense spots. Cutting straight down and lifting preserves their light, flaky texture.
Final Thoughts
This Homemade Classic Strawberry Scones with Cream and Jam Recipe is truly a joy to make and even more delightful to eat. Whether you’re sharing with friends at a cozy tea party or savoring a quiet moment on your own, these scones bring a little touch of happiness with every bite. I hope you’ll give this recipe a go and find as much comfort and joy in it as I always do!