“`html
If you’re craving a crunchy, flavorful snack or side that’s steeped in Southern charm, this Fried Okra Recipe will absolutely steal your heart. Imagine tender okra slices coated in a perfectly seasoned cornmeal and flour crust, fried until golden crisp. It’s the kind of dish that keeps you coming back for one more bite, with each piece delivering a satisfying crunch and a subtle hint of sweetness from the okra itself. This recipe brings together simple ingredients in a way that turns humble vegetables into pure comfort on a plate, making it an all-time favorite to share with friends and family.

Ingredients You’ll Need
The beauty of this Fried Okra Recipe lies in its simplicity—each ingredient plays an essential role in creating that irresistible crispy coating and tender inside. From the creamy buttermilk soak to the golden cornmeal, these staples come together to highlight the okra’s natural flavor and texture perfectly.
- Okra (1 pound): Fresh and firm, sliced with caps cut off to ensure even frying and a tender bite.
- Large egg (1): Acts as a binding agent to help the coating stick beautifully.
- Buttermilk (¼ cup): Adds tang and tenderness, softening the okra before frying.
- Vegetable oil: The perfect frying medium that gets the coating golden and crispy without overpowering flavors.
- All-purpose flour (½ cup): Provides structure to the coating, blending smoothly with cornmeal.
- Cornmeal (½ cup): Gives that unmistakable gritty crunch and a hint of sweetness for a classic Southern flair.
- Kosher salt (½ teaspoon): Enhances the flavors, ensuring the okra tastes as vibrant as possible.
- Ground black pepper (¼ teaspoon): Adds a gentle, warming spice to balance the dish.
How to Make Fried Okra Recipe
Step 1: Soak the Okra in Buttermilk Mixture
Start by whisking the egg and buttermilk together in a shallow bowl until well combined. Toss your sliced okra into this mixture, fully coating each piece. Letting it sit for about 10 minutes allows the okra to absorb the tangy flavors and softens the vegetable just enough, prepping it perfectly to hold onto the coating in the next steps.
Step 2: Heat the Oil for Perfect Frying
Pour about an inch of vegetable oil into a Dutch oven or heavy-bottomed pan and heat it to 375°F. This temperature is crucial; too hot and the coating burns before the okra cooks through, too cool and it will soak up oil and become greasy. While the oil heats, get a plate ready lined with paper towels to drain your crispy okra.
Step 3: Prepare the Coating Mixture
In another shallow bowl, whisk together the flour, cornmeal, kosher salt, and black pepper. This combination is the cornerstone of your crunchy coating, balancing tenderness and texture for the ideal crisp.
Step 4: Coat the Okra
Using a slotted spoon or tongs, lift the okra out of the buttermilk mixture, allowing the excess to drip off. Then, toss the okra pieces in the flour and cornmeal mixture, ensuring each slice is evenly coated. Shake off any extra flour to avoid a thick breading, which can weigh down the light, crispy finish you’re aiming for.
Step 5: Fry the Okra in Batches
Carefully place the coated okra pieces into the hot oil, frying in small batches to maintain oil temperature and prevent overcrowding. Each batch will take about 2 to 3 minutes, or until the okra turns a stunning golden brown on all sides. The sizzling sound and golden color are your cues that crispy perfection is just minutes away.
Step 6: Drain and Season
Use a slotted spoon to transfer the fried okra onto the paper towel-lined plate to drain excess oil. While still hot, sprinkle a pinch of salt over the okra to elevate the flavor and add that finishing touch of seasoning.
Step 7: Serve Immediately for Best Crunch
Fried okra is at its absolute best straight from the pan when every bite still crackles with crispiness. If you need to hold the fried okra for a little while, place it in a warm oven set to 200°F to keep it warm without losing that delightful crunch.
How to Serve Fried Okra Recipe

Garnishes
Keep it simple yet fresh with a squeeze of lemon juice or a sprinkle of chopped parsley. These bright additions contrast beautifully with the rich, fried exterior and give the dish a burst of freshness that keeps your taste buds excited.
Side Dishes
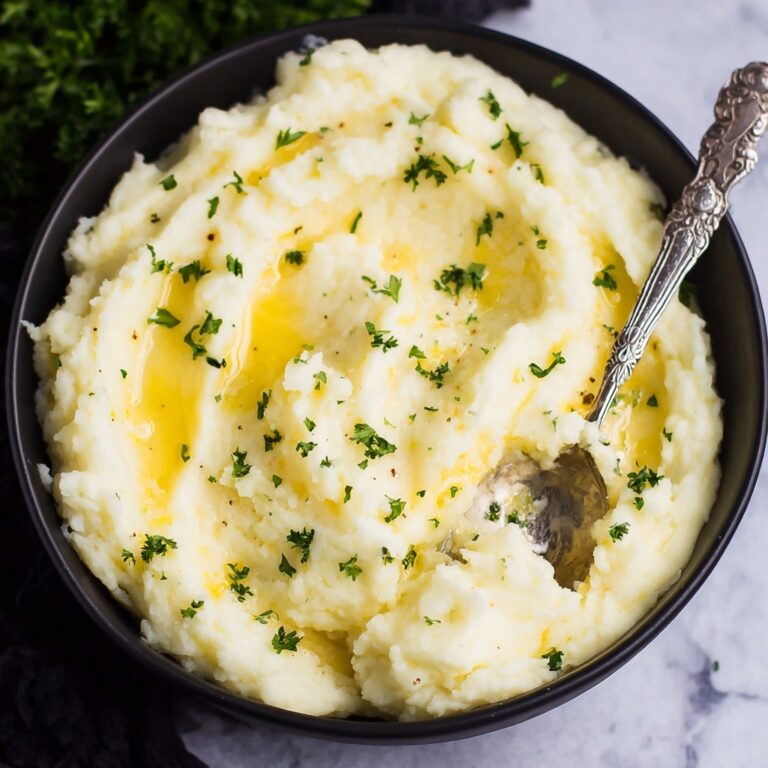
Fried okra pairs wonderfully with Southern staples like creamy mashed potatoes, buttermilk biscuits, or flaky cornbread. You can also serve it alongside barbeque ribs or grilled chicken for a hearty, flavor-packed meal that feels like a warm hug on a plate.
Creative Ways to Present
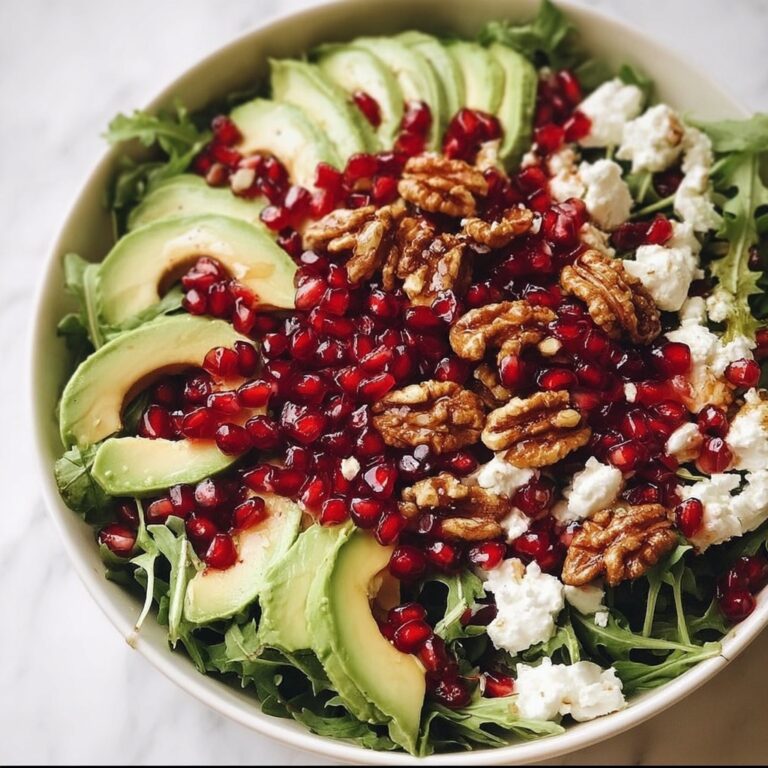
For a fun twist, serve your fried okra as a crunchy topping over fresh green salads or creamy pimento cheese dip. Another delightful presentation is skewering the fried okra for easy snacking at parties—perfect for sharing and dipping into spicy ranch or remoulade sauces.
Make Ahead and Storage
Storing Leftovers
Place any leftover fried okra in an airtight container and store it in the refrigerator. It will keep well for up to 2 days, but keep in mind that the coating may lose some crispiness as time passes.
Freezing
Freezing fried okra is possible, but it’s best to freeze it unfried for optimal texture. To freeze leftovers after frying, spread the pieces on a baking sheet to flash freeze individually before transferring them to a bag or container. This prevents clumping and makes reheating easier.
Reheating
To bring back the crispy goodness, reheat leftover fried okra in a preheated 375°F oven on a baking sheet for 8 to 10 minutes. Avoid the microwave if you want to keep the texture crunchy and delicious.
FAQs
Can I use frozen okra for this Fried Okra Recipe?
While you can use frozen okra, fresh okra is preferred to achieve that perfect crisp. Frozen okra tends to release extra moisture, which can make the coating soggy. If using frozen, make sure to thaw and thoroughly pat dry before proceeding.
What can I substitute for buttermilk?
If you don’t have buttermilk on hand, you can make a quick substitute by adding one tablespoon of lemon juice or white vinegar to ¼ cup of milk. Let it sit for a few minutes before using—it will mimic the tangy acidity buttermilk brings to the recipe.
Is it necessary to soak the okra before frying?
Soaking the okra in the egg and buttermilk mixture helps tenderize the vegetable and improves the coating’s ability to stick. Skipping this step could result in a less flavorful or uneven crust, so it’s definitely recommended for best results.
How do I prevent the okra from getting slimy?
The key is cooking the okra quickly at the right temperature. Frying in hot oil crisps the exterior immediately, sealing in the moisture without turning the okra slimy. Proper draining on paper towels and avoiding overcrowding the pan are also crucial steps.
Can I make this recipe gluten-free?
Absolutely! Simply swap out the all-purpose flour for a gluten-free flour blend and ensure your cornmeal is labeled gluten-free. This swap will still give you a deliciously crunchy coating without compromising the taste.
Final Thoughts
This Fried Okra Recipe is a little slice of Southern magic that’s easy to make and impossible not to love. Whether you’re making it for a casual weeknight dinner or as a crowd-pleasing appetizer, the crisp, tender bites will have everyone asking for seconds. Give it a try and discover why fried okra holds a special place in so many hearts and kitchens.
“`