If you’ve never tried a Chocolate Self-Saucing Pudding Recipe, prepare yourself for one of the most comforting, luscious desserts you’ll ever make at home. This recipe creates a warm, tender chocolate cake with a magically gooey, rich chocolate sauce bubbling underneath, all baked in one simple dish. It’s the ultimate crowd-pleaser that feels like a cozy hug on a plate, perfect for sharing with friends or indulging in solo. Once you fall in love with this luscious pudding, it’s bound to become a regular feature in your dessert rotation.
Ingredients You’ll Need
What’s wonderful about this Chocolate Self-Saucing Pudding Recipe is how it uses pantry staples that come together effortlessly to create complex flavors and textures. Each ingredient plays a key role, from the deep cocoa powder coloring the pudding with a rich chocolate intensity, to the brown sugar adding warmth and a hint of molasses that brings depth to the sauce beneath.
- Brown sugar (1 cup, loosely packed): Adds a natural caramel sweetness and helps create the luscious self-saucing effect beneath the cake.
- Unsweetened cocoa powder (both 1/4 cup and 1/4 cup): Provides the intense chocolate flavor that defines this dessert.
- Boiling water (1 1/4 cups): Activates the cocoa and sugar mixture, forming the rich chocolate sauce under the pudding.
- Plain flour (1 cup): Builds the cake’s tender crumb that holds everything together.
- Baking powder (2 1/2 tsp): Ensures a light and fluffy texture, balancing the dense, moist sauce below.
- White sugar (1/3 cup): Sweetens the cake batter without overpowering the cocoa’s natural bitterness.
- Pinch of salt: Enhances all the chocolate and sweetness, rounding out the dessert’s flavor.
- Milk (1/2 cup): Keeps the batter moist and tender.
- Butter (50g, melted): Adds richness and a silky texture to the cake.
- Egg (1): Provides structure and a fluffy lift to the batter.
- Vanilla extract (1 tsp): Introduces a subtle sweetness and aroma that complements the chocolate perfectly.
How to Make Chocolate Self-Saucing Pudding Recipe
Step 1: Preparing Your Oven and Dish
First things first, preheat your oven to 170C (or 150C if you’re using a fan-forced oven). Then, generously butter a 5 to 6 cup baking dish. This step is important so your pudding slides out effortlessly and the edges don’t stick, allowing the pudding to bake evenly while developing a beautiful crust on top.
Step 2: Mixing the Topping
In a small bowl, whisk together the brown sugar and 1/4 cup of cocoa powder. This simple mixture forms the magic sauce layer once the hot water is poured over it during baking, turning into a silky, molten chocolate pool beneath the cake’s surface.
Step 3: Combining Dry Ingredients
Next up, in a larger bowl, sift together your flour, baking powder, white sugar, the second 1/4 cup of cocoa powder, and a pinch of salt. Whisking these dry ingredients well ensures your batter will be light and smooth, without any lumps to disrupt that perfect crumb.
Step 4: Preparing the Wet Ingredients
In a jug or separate bowl, whisk the melted butter and milk together nicely. Then, add the egg and vanilla extract, whisking well until the mixture is fully combined and silky smooth. This blend brings moisture, richness, and lift to the pudding batter.
Step 5: Bringing It All Together
Pour your wet ingredients into the bowl of dry ingredients, and gently fold or whisk until you achieve a thick, luscious batter. Don’t overmix here; just combine everything so there are no large flour streaks but the texture remains thick and velvety.
Step 6: Layering the Pudding
Spoon or spread the batter evenly into your prepared baking dish. Now sprinkle the chocolate sugar topping mixture over the batter’s surface, then gently shake the pan to spread it into a thin, even layer. This topping will create the glossy, gooey sauce once baked.
Step 7: Adding the Magic Touch
This step is where the “self-saucing” magic happens. Carefully pour the boiling water all over the back of a large dessert spoon directly onto the pudding. Doing this gradually helps the water spread gently over the sugar and cocoa, creating that delicious sauce underneath the cake layer as it bakes.
Step 8: Baking to Perfection
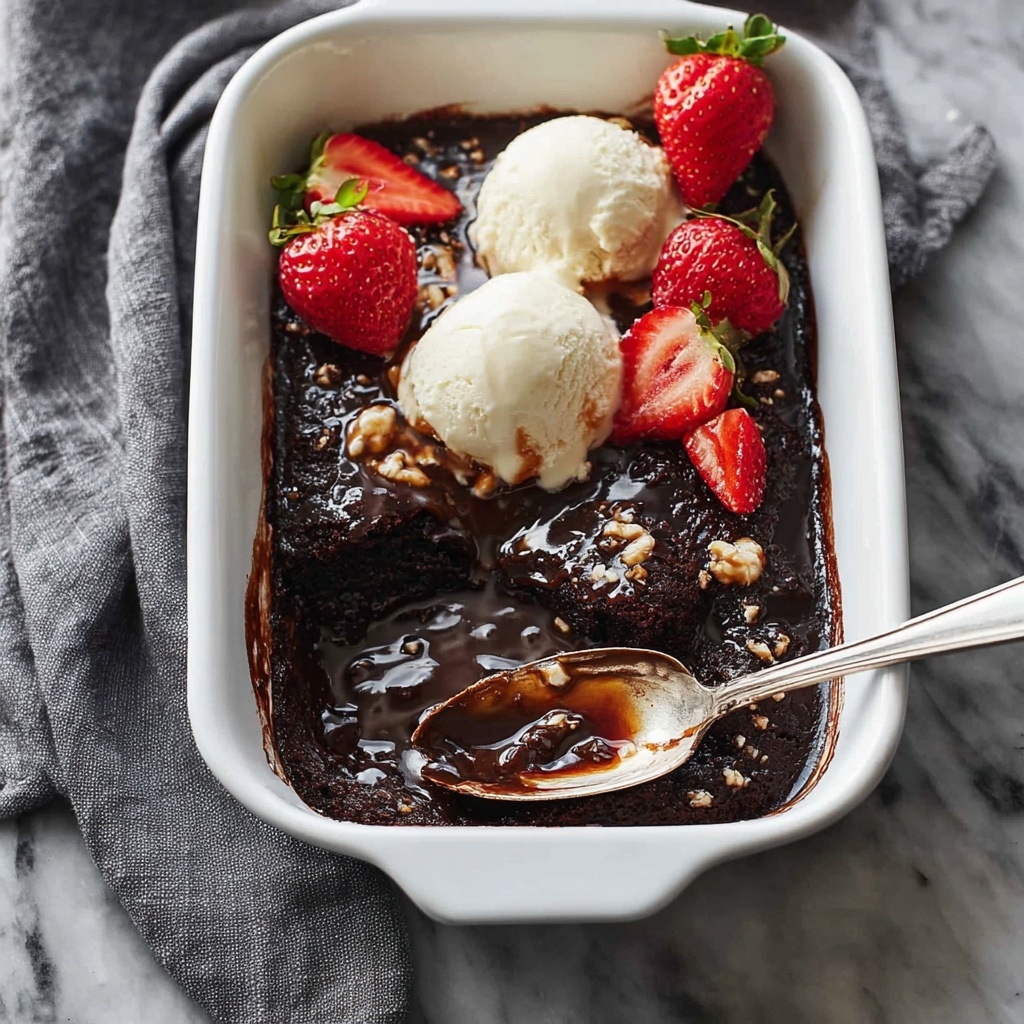
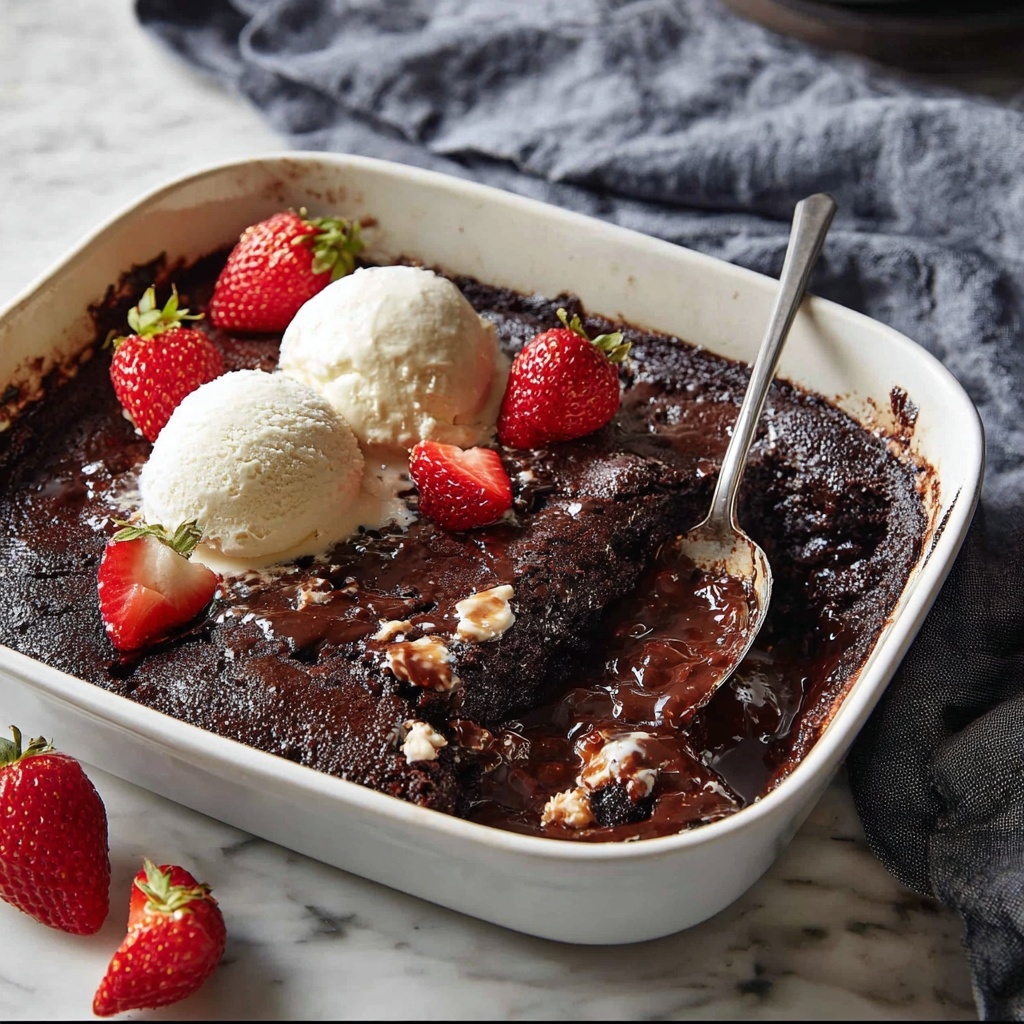
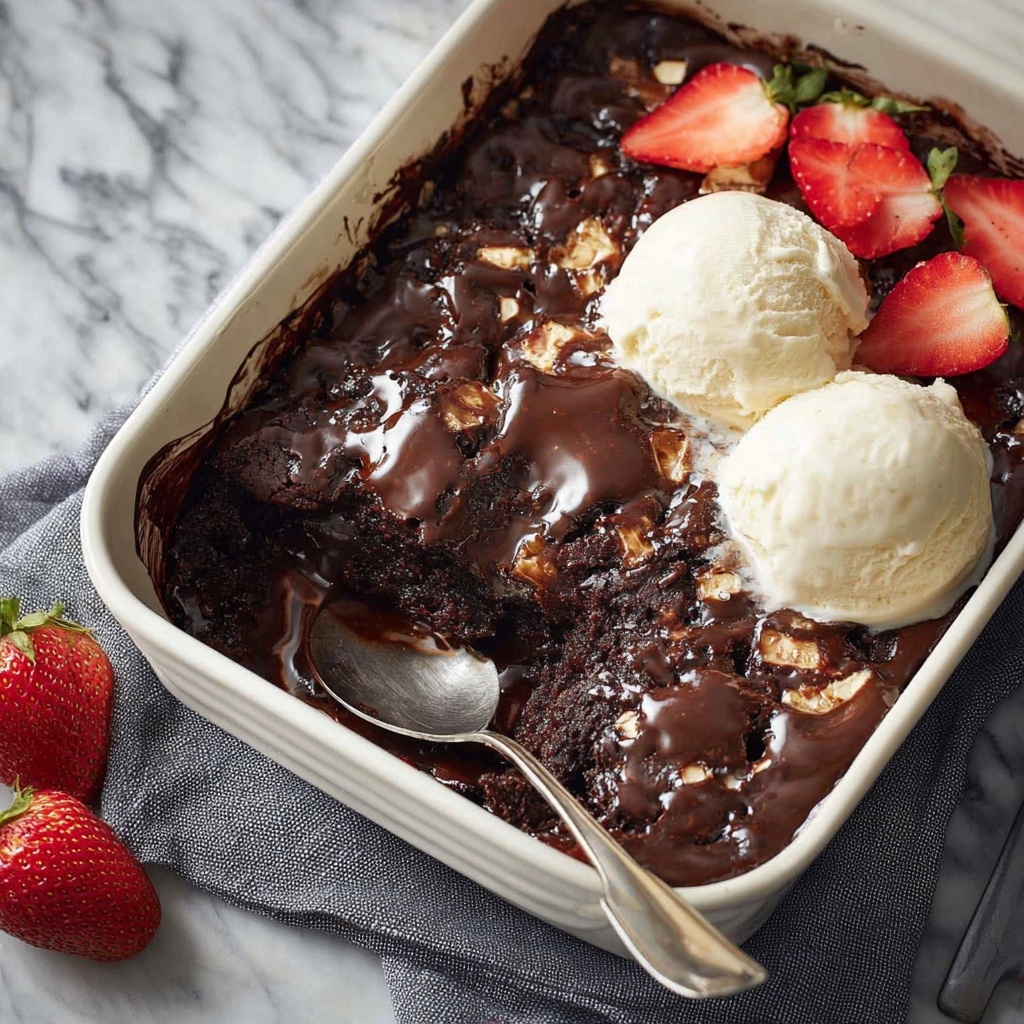
Pop your pudding into the oven and bake for about 30 minutes. You’ll know it’s ready when the top feels springy to the touch and has formed a slightly crusty brownie-like layer. Peek inside, and you’ll find a bubbling, gooey chocolate sauce lovingly waiting beneath that tender cake top.
Step 9: Resting Before Serving
Once out of the oven, let your pudding rest for just a few minutes. This brief wait lets the bubbling sauce settle slightly while still remaining ooey-gooey, making each spoonful rich and velvety.
How to Serve Chocolate Self-Saucing Pudding Recipe
Garnishes
Top your warm pudding with a generous dollop of whipped cream or a scoop of vanilla ice cream to add a creamy contrast to the rich chocolate sauce. Fresh berries also add a delightful tartness that balances the richness beautifully.
Side Dishes
Though this pudding shines as a stand-alone dessert, pairing it with a lightly sweetened mascarpone or a simple custard can elevate the experience. A cup of robust coffee or black tea also pairs wonderfully alongside to complement the deep chocolate flavors.
Creative Ways to Present
For a special occasion, serve your Chocolate Self-Saucing Pudding Recipe in individual ramekins for an elegant touch. You can dust the tops with a sprinkle of cocoa powder or edible gold dust for a festive look. Garnishing with chocolate shavings or a sprig of mint adds that final wow factor.
Make Ahead and Storage
Storing Leftovers
This pudding is best enjoyed fresh, but if you have leftovers, cover the dish tightly and store it in the refrigerator for up to 2 days. While the sauce will firm up when chilled, reheating will bring back much of the silky texture.
Freezing
You can freeze the pudding before baking. Cover it well with foil or plastic wrap and freeze for up to 1 month. When ready to enjoy, bake it straight from the freezer, adding extra minutes to the cooking time until it’s cooked through.
Reheating
Warm individual servings in the microwave for about 30 to 45 seconds or reheat the whole dish in a moderate oven until heated through. Add a splash of milk or cream if the pudding feels too thick after cooling.
FAQs
What makes this a “self-saucing” pudding?
The magic lies in pouring boiling water over the sugar and cocoa topping before baking, which creates a luscious chocolate sauce beneath the cake as it cooks. You end up with both cake and sauce in one delicious dish.
Can I use a different type of flour?
All-purpose flour works best here, but you can experiment with gluten-free flours, keeping in mind they might affect texture slightly. You may need to adjust the liquid for best results.
Is it possible to make this vegan?
With some modifications, yes! Substitute the egg with a flax or chia egg, use plant-based milk, and replace butter with a vegan alternative. However, it may slightly change the texture and richness.
Can I make this pudding ahead of time?
You can prepare the batter and toppings a day ahead, but it’s best to bake the pudding fresh right before serving for the optimal sauce texture and warmth.
Why is the pudding’s top crusty?
The slight crust forms because the batter’s surface bakes dry while the sauce underneath remains moist and molten, giving you that lovely contrast between crumbly cake and silky sauce.
Final Thoughts
There is something truly comforting about the warm, gooey charm of this Chocolate Self-Saucing Pudding Recipe that makes it a wholehearted favorite every time. It’s so simple to prepare yet feels indulgent and special, perfect for cozy nights or impressing guests with minimal fuss. Give this recipe a try, and you just might find yourself reaching for it whenever you crave that perfect chocolate fix.