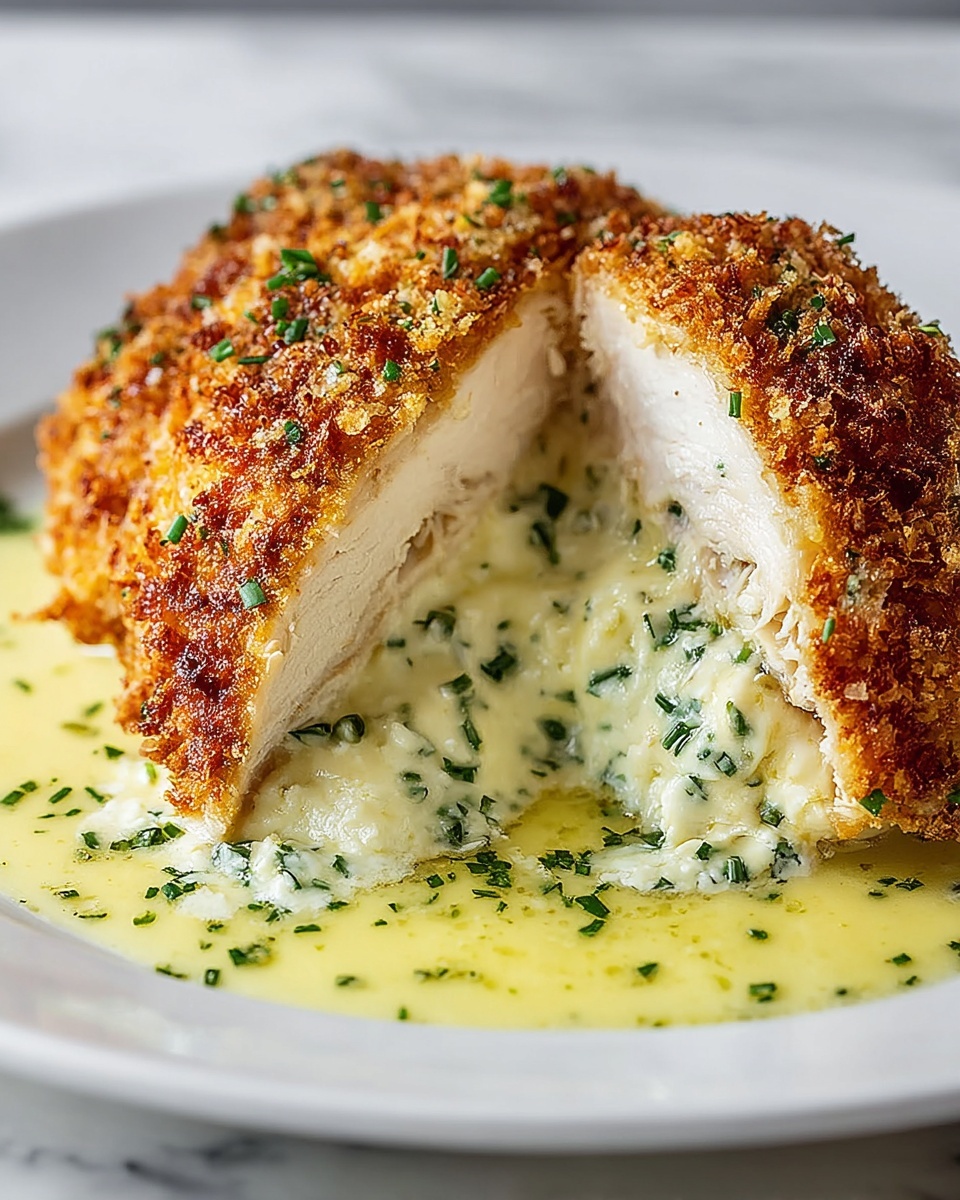
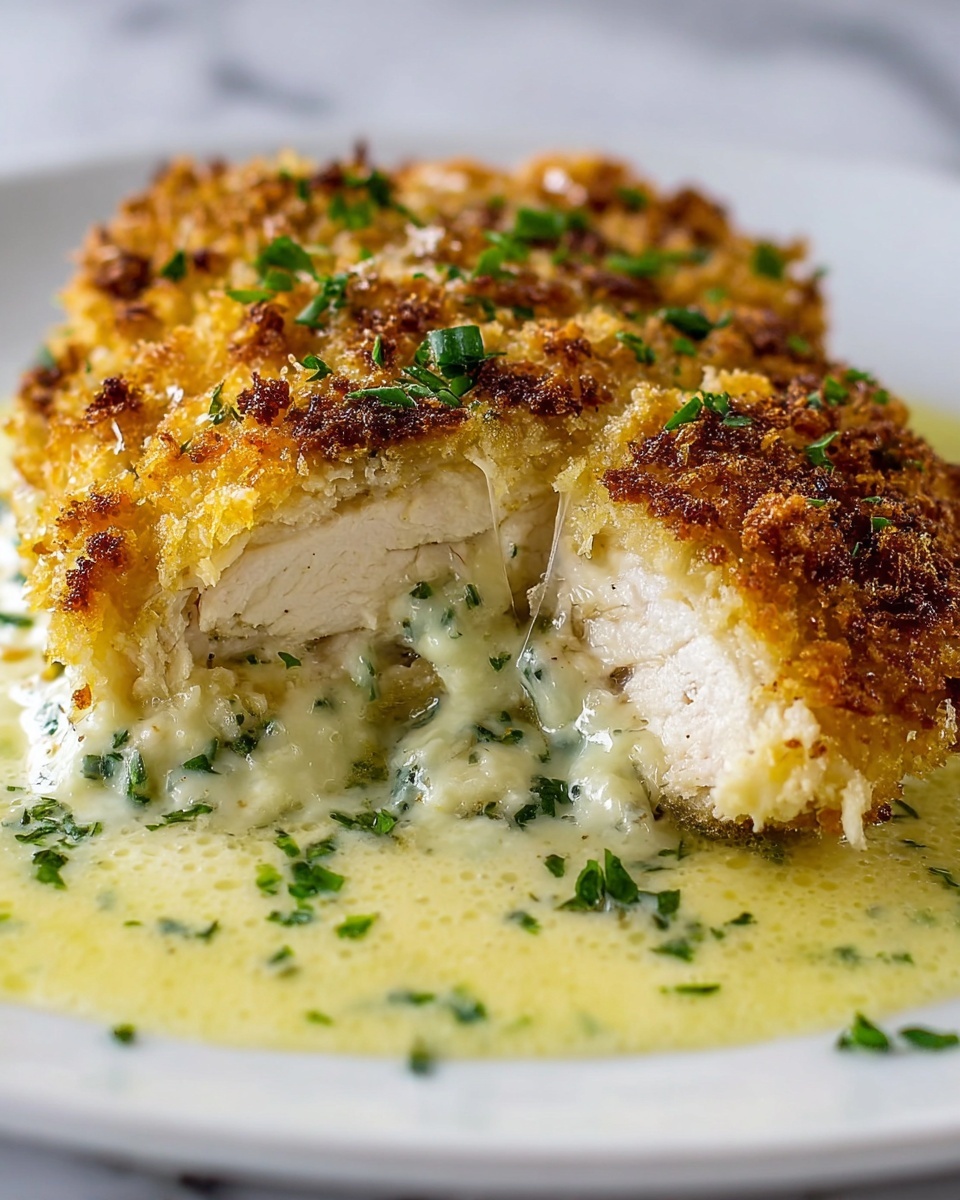
If you are craving a dish that brilliantly balances crispy, juicy, and buttery textures all in one bite, then this Homemade Chicken Kiev Recipe is about to become your new kitchen favorite. Imagine tender chicken breasts wrapped around a luscious blend of fresh herbs and garlic butter that oozes out the moment you cut into it, creating a gastronomic experience that’s both comforting and elegant. This recipe is straightforward but packs a punch with its vibrant flavors and crispy golden coating, making it perfect for impressing guests or elevating a family dinner.
Ingredients You’ll Need
Getting these few but essential ingredients ready is the first step to creating the magic of a perfect Chicken Kiev. Each one has its own role, from creating the sumptuous butter filling to giving the exterior that satisfying crunch and golden color.
- 4 pieces Boneless, skinless chicken breasts (6-8 oz each): The hearty and tender main protein that cradles the flavorful butter inside.
- 1 cup Unsalted Butter (Softened to room temperature): This will transform into the delectable herbed filling that melts beautifully within the chicken.
- 2 tablespoons Fresh Parsley (Chopped finely): Adds a fresh, vibrant note with a bit of color contrast in the butter mix.
- 2 tablespoons Fresh Dill (Chopped finely): Brings a subtle, aromatic earthiness that makes the butter burst with flavor.
- 2 tablespoons Fresh Chives (Chopped finely): Offers a mild oniony kick to round out the herbaceous butter.
- 2 cloves Garlic (Minced): A punch of savory zest that complements the fresh herbs perfectly.
- 1 tablespoon Lemon Juice (Freshly squeezed): Provides a bright acidity that balances the richness of the butter.
- 1 teaspoon Salt (To taste): Enhances and unifies all the flavors in both the chicken and the butter.
- 0.5 teaspoon Black Pepper (To taste): Adds just enough warmth and depth to the seasoning.
- 1 cup All-Purpose Flour (For dredging): Helps the coating stick and creates a base layer for extra crispiness.
- 2 large Eggs (Beaten): Binds the breadcrumbs to the chicken for that irresistible crunchy crust.
- 2 cups Breadcrumbs (Plain or panko for extra crunch): A key component for achieving a golden, crunchy exterior.
- 1 cup Vegetable Oil (For frying): Provides the perfect medium for frying the Kiev to a golden brown without overpowering its delicate flavors.
How to Make Homemade Chicken Kiev Recipe
Step 1: Prepare the herbed butter
Start by mixing the softened unsalted butter with minced garlic, chopped parsley, dill, chives, and a splash of freshly squeezed lemon juice. Season this vibrant butter with salt and black pepper to bring out all the fresh flavors and create a rich, aromatic filling.
Step 2: Chill the herbed butter
Shape the flavorful butter mixture into a compact log using plastic wrap, then pop it into the fridge for at least 30 minutes. Chilling will make it easier to slice and helps the butter keep its shape inside the chicken during cooking.
Step 3: Pound the chicken breasts
Place each chicken breast between two sheets of plastic wrap and gently pound it down to about half an inch thick. This not only tenderizes the chicken but also creates a perfect pocket to hold the chilled butter.
Step 4: Assemble the Kievs
Cut the chilled butter log into four equal slices. Place a slice in the center of each flattened chicken breast, then fold the edges over the butter, sealing it completely. Secure with toothpicks or kitchen twine so nothing escapes while frying.
Step 5: Set up the dredging station
Get ready to coat your chicken by arranging three shallow dishes – one with flour, the second with beaten eggs, and the third with breadcrumbs. This classic triple coating method creates that irresistible crispy crust.
Step 6: Coat the chicken
First, dredge each stuffed chicken breast in flour, shaking off any excess. Next, dip it into the beaten eggs to moisten, and finally roll it thoroughly in the breadcrumbs. Make sure the chicken is evenly coated to lock in moisture and get that perfect crunch.
Step 7: Fry the Chicken Kievs
Heat the vegetable oil in a frying pan over medium-high heat. Carefully place the coated chicken breasts in the oil and fry for 4-5 minutes on each side until they develop a deep golden brown color and are cooked through, giving you a crisp exterior and juicy inside.
Step 8: Drain and rest
Once fried, transfer the Kievs to a paper towel-lined plate. Let them rest for a couple of minutes to drain excess oil and to let the butter inside settle for a perfect melt when sliced.
Step 9: Serve and impress
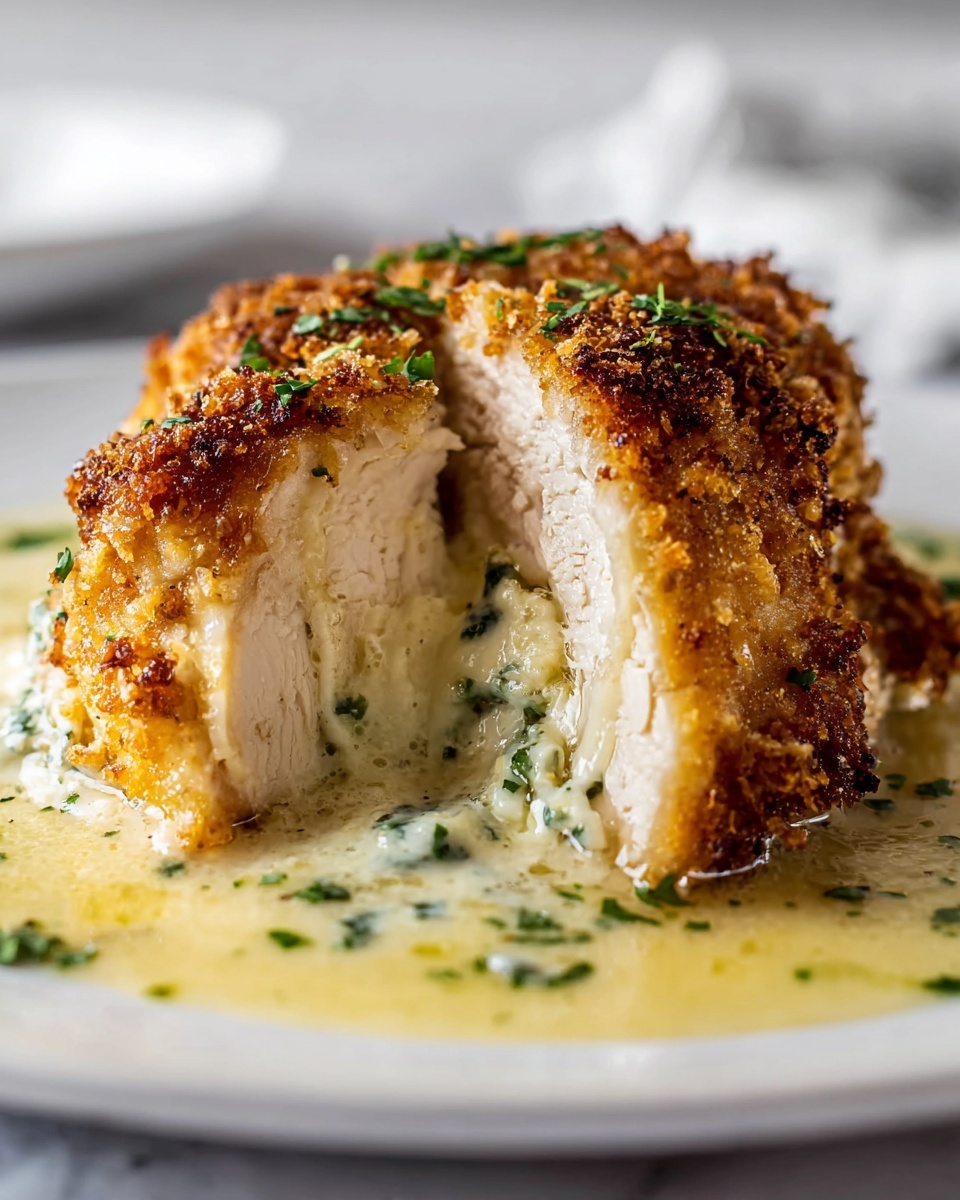
Slice each chicken Kiev in half to reveal the luscious, herbed butter oozing out. Serve immediately to bask in the full glory of that marvelous melting center.
How to Serve Homemade Chicken Kiev Recipe
Garnishes
Fresh herbs like parsley or dill sprinkled on top add a lovely pop of color and echo the flavors inside. A lemon wedge on the side invites a quick squeeze for a fresh, zesty finish that complements the richness of the dish.
Side Dishes
This dish pairs wonderfully with simple, comforting sides. Think creamy mashed potatoes, buttery steamed vegetables, or even a light green salad dressed with vinaigrette. These sides help balance the indulgence of the butter-filled chicken.
Creative Ways to Present
For a show-stopping presentation, slice the Kievs just before serving to reveal the molten buttery center. Arrange them on a rustic wooden board or a bright, colorful plate to make the golden crust and green herbs pop. Adding a drizzle of garlic lemon sauce or a sprinkle of paprika on the plate adds a touch of elegance.
Make Ahead and Storage
Storing Leftovers
Leftover Homemade Chicken Kiev keeps well in an airtight container in the fridge for up to 2 days. To maintain the crispiness, it’s best to reheat it in the oven rather than the microwave.
Freezing
You can freeze the assembled, breaded Chicken Kievs before cooking by wrapping each individually in plastic wrap and placing them in a freezer-safe bag. They can be frozen for up to 1 month, making it a handy option for a quick, homemade meal later.
Reheating
Reheat leftover or frozen-cooked Kievs in a preheated oven at 350°F (175°C) for 10-15 minutes, or until heated through and the coating is crisp again. Avoid microwaving to prevent sogginess and ensure the butter inside is perfectly molten.
FAQs
Can I use chicken thighs instead of breasts?
Absolutely! Chicken thighs can offer juicier meat, but you might want to trim excess fat and pound them evenly to ensure proper cooking and even filling distribution.
What is the best type of breadcrumb to use?
Panko breadcrumbs are my recommendation for extra crunch and a lighter coating, but plain breadcrumbs work well if you prefer a denser crust.
Can I bake the Chicken Kiev instead of frying?
Yes, baking at 375°F (190°C) for about 25-30 minutes until golden and cooked through is a healthier alternative, though it might not be quite as crispy as frying.
How do I prevent the butter from leaking during cooking?
Chilling the butter until very firm and sealing the chicken edges tightly with toothpicks or twine helps keep the butter inside during frying or baking.
Is this dish suitable for meal prep?
Since the butter filling is fresh, Homemade Chicken Kiev tastes best when cooked and served fresh, but you can prep the chicken ahead and cook it just before serving.
Final Thoughts
Making this Homemade Chicken Kiev Recipe is like bringing a slice of classic European comfort food into your home with an approachable and rewarding cooking experience. It’s a dish filled with flavor, texture, and that magical melted herb butter center that never fails to impress. I can’t wait for you to try it and savor every buttery, crispy bite with your loved ones!