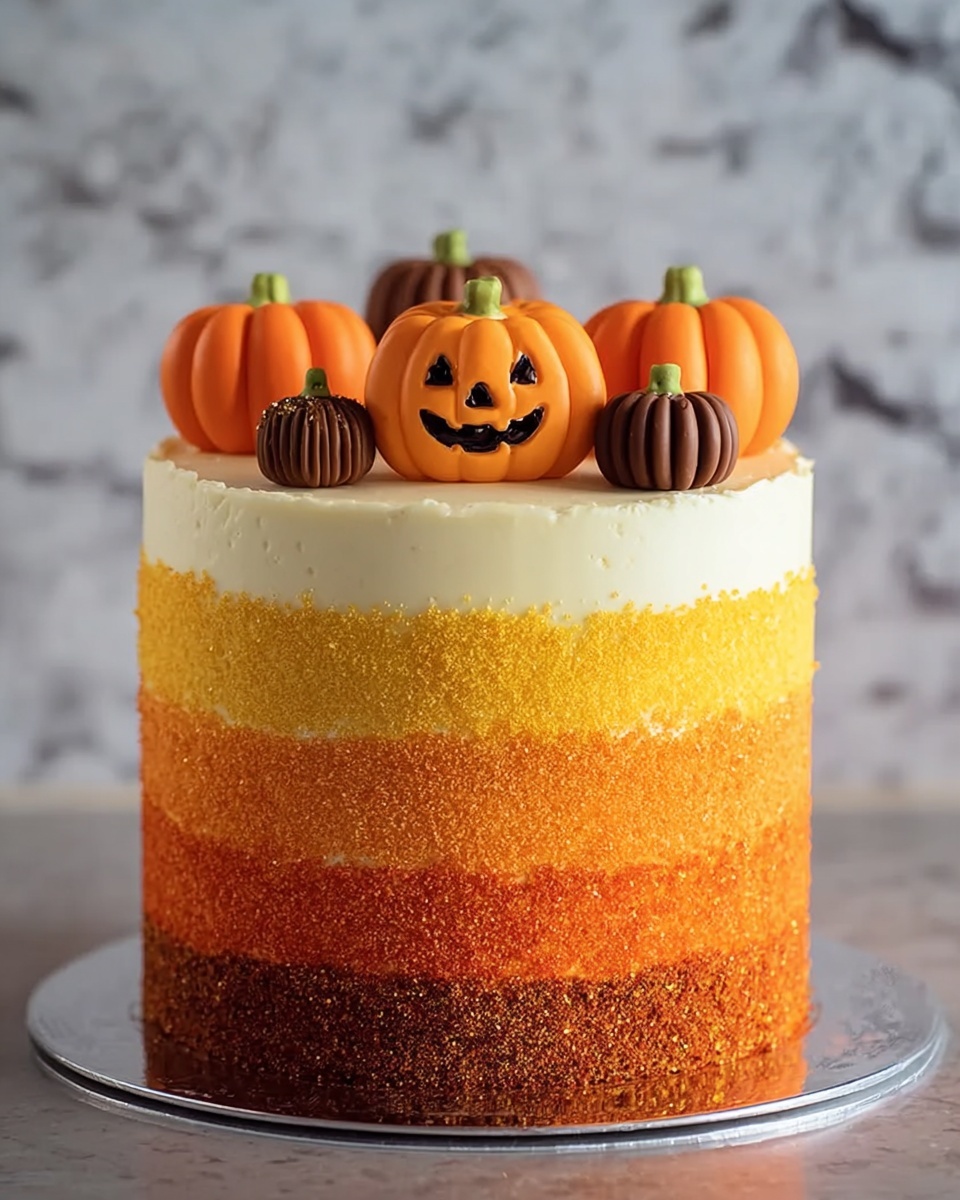
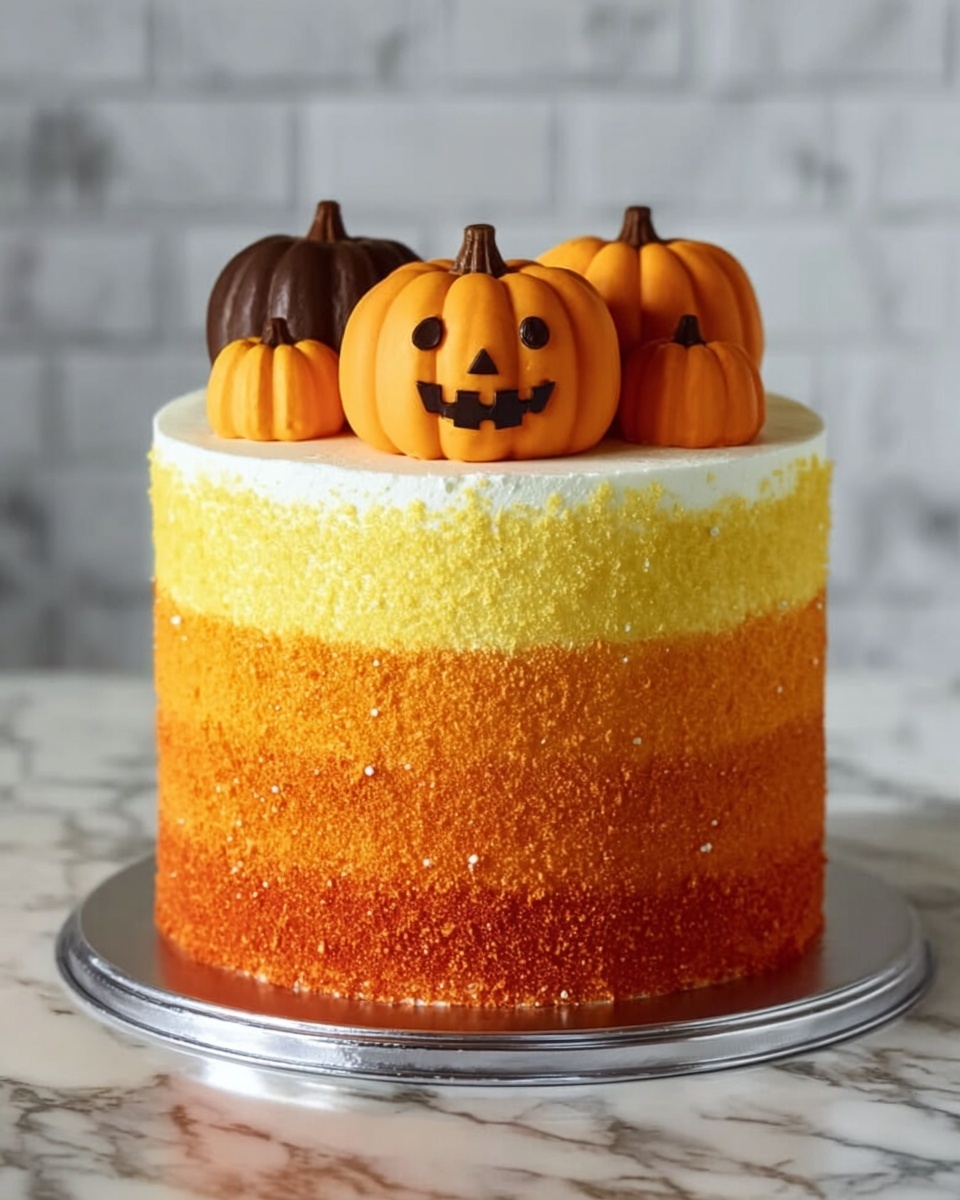
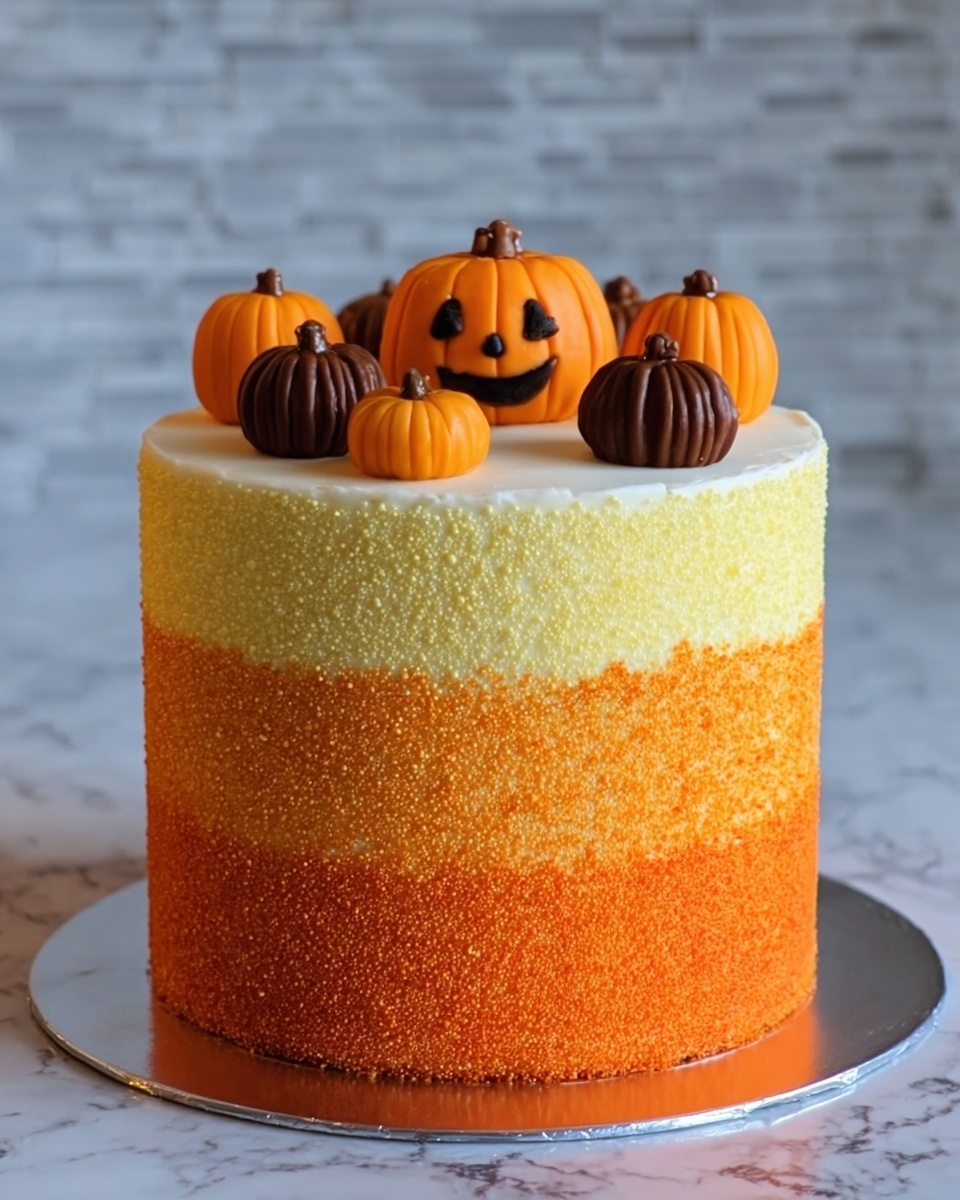
If you’re looking to wow your friends and family with a festive showstopper this season, the Stenciled Halloween Sprinkle Cake Recipe is exactly what you need. This delightful cake combines moist layers, a luscious buttercream, and a fun, festive stencil design sprinkled with colorful sanding sugar and candies. It’s not just a cake; it’s a piece of Halloween magic that’s both visually stunning and utterly delicious, perfect for celebrations or cozy gatherings during the spooky season.
Ingredients You’ll Need
Getting the perfect balance of flavor and texture starts with simple, high-quality ingredients. Each component, from the creamy butter to the vibrant gel food coloring, plays an essential role in making this cake both taste amazing and look incredible.
- 8 oz unsalted butter: At room temperature for smooth mixing and rich flavor in the cake base.
- 21 oz granulated sugar (3 cups): For the perfect sweetness that balances the cake’s moistness.
- 6 large eggs: Also at room temperature to ensure a light, fluffy structure.
- 20.25 oz all-purpose flour (4 1/2 cups): The foundation that provides the right crumb and stability for layering.
- 2 tsp salt: Enhances all the flavors and balances sweetness.
- 7 tsp baking powder (2 tbsp + 1 tsp): The secret to a perfectly risen cake that’s tender and airy.
- 2 1/2 cups milk: At room temperature to keep the batter smooth and evenly mixed.
- 1 tbsp vanilla extract: Adds a warm, inviting aroma and subtle sweet flavor.
- 8 fl oz pasteurized liquid egg whites (1 cup): For extra lightness in the buttercream.
- 32 oz powdered sugar (8 cups): Essential to create the rich, creamy sweetness of the buttercream icing.
- 3/4 tsp salt: Balances the buttercream and brings out the best in the sweetness.
- 32 oz unsalted butter (4 cups): At room temperature for the luscious, spreadable buttercream.
- 2 1/2 tbsp vanilla extract: Infuses the buttercream with delightful flavor.
- Assorted gel food coloring (yellow, orange, electric orange): To bring the vibrant Halloween theme to life.
- Sanding sugar in white, gold, yellow, and orange: For added sparkle and texture when decorating.
- Parchment paper (for stenciling): Essential to create the perfect festive patterns on top of the cake.
- Orange and yellow round candies (like Sixlets): Adds playful, colorful accents to the final presentation.
How to Make Stenciled Halloween Sprinkle Cake Recipe
Step 1: Prepare Your Batter
Start by creaming the 8 oz butter and granulated sugar together until the mixture is light and fluffy, which takes about 5 minutes using a stand mixer. Then, beat in the eggs one at a time, making sure each is fully incorporated before adding the next. This ensures the cake’s texture will be smooth and even. In a separate bowl, sift together the flour, salt, and baking powder to avoid any lumps and promote an even rise.
Step 2: Combine Dry and Wet Ingredients
Alternately add the dry ingredients and the milk to your wet mixture, starting and ending with the dry. Mix gently after each addition to keep the batter light and airy. Stir in the vanilla extract for that signature sweet warmth. The final batter should be thick but pourable, perfect for creating those tall, beautiful layers.
Step 3: Bake the Cake Layers
Divide your batter evenly between greased cake pans and smooth the tops with a spatula. Bake in a preheated oven at 350°F for about 30-35 minutes, or until a toothpick inserted in the center comes out clean. Once baked, allow the cakes to cool completely on wire racks before moving on to frosting. This cooling time is crucial to prevent the buttercream from melting when applied.
Step 4: Make the Buttercream Frosting
Beat the 4 cups of unsalted butter at room temperature until creamy, then gradually add the powdered sugar along with the salt. Pour in the pasteurized liquid egg whites and vanilla extract to give the frosting an ultra-smooth, silky texture. Continue whipping until light and fluffy. Divide frosting into separate bowls and tint each with your yellow, orange, and electric orange gel food coloring for that perfect Halloween palette.
Step 5: Assemble and Frost the Cake
Place one cake layer on your serving plate and spread a generous amount of frosting over the top. Repeat this for each layer, covering the sides and top of the cake with a crumb coat first. Chill the cake briefly to set this initial layer. Then, apply a final smooth layer of colored buttercream, blending the hues for a subtle ombré effect or distinct stripes depending on your creative vision.
Step 6: Stencil and Decorate
Lay your parchment paper stencil gently on top of the cake and sprinkle carefully with assorted sanding sugar in white, gold, yellow, and orange. Lift the stencil straight up to reveal the crisp, festive patterns underneath. Finally, scatter orange and yellow round candies around the top edges or center, adding a playful touch that completes your Halloween masterpiece.
How to Serve Stenciled Halloween Sprinkle Cake Recipe
Garnishes
To really give your Stenciled Halloween Sprinkle Cake Recipe an extra pop, think beyond just frosting. Add a few fresh edible flowers or a sprinkle of crushed candy corn alongside the sanding sugar for starring roles in your cake’s presentation. Candied pumpkin seeds or even a drizzle of dark chocolate syrup can add depth both in looks and flavor.
Side Dishes
This cake pairs beautifully with warm drinks like spiced apple cider or a rich hot chocolate. The comforting flavors of fall beverages complement the sweet, buttery cake and its vibrant, sugary toppings perfectly. For something lighter, fresh fruit slices such as crisp apples or pears can help balance indulgence with some refreshing texture.
Creative Ways to Present
Display your cake on a rustic wooden cake stand or a Halloween-themed platter to enhance the festive spirit. For parties, consider serving individual slices garnished with mini candy corns or a dollop of whipped cream. You can even turn leftover frosting and sprinkle decorations into themed cupcakes for surprise treats that match your stenciled masterpiece.
Make Ahead and Storage
Storing Leftovers
Keep your cake fresh by storing leftovers in an airtight container at room temperature for up to two days, or in the refrigerator for up to five days. Be sure to cover it well to prevent the sanding sugar decoration from absorbing moisture and losing its crunch. Room temperature storage is ideal if you plan to enjoy it quickly.
Freezing
If you want to save your Stenciled Halloween Sprinkle Cake Recipe for later, freezing is a great option. Wrap the cake tightly in plastic wrap and then again in foil to protect it from freezer burn. It will keep for up to three months. When you’re ready to enjoy, thaw the cake overnight in the refrigerator before bringing it to room temperature.
Reheating
While this cake is best served chilled or at room temperature, if you prefer it slightly warm, enable a gentle warming. Warm individual slices in a microwave for about 10-15 seconds, but be careful—the buttercream can melt quickly. Always check after short intervals to maintain that perfect texture.
FAQs
Can I use regular egg whites instead of pasteurized liquid egg whites in the frosting?
Yes, you can use fresh egg whites if they are pasteurized or if you’re confident in the freshness and safety. Pasteurized liquid egg whites reduce health risks and make the preparation easier, but fresh egg whites whipped well will also deliver that fluffy, smooth buttercream texture.
What if I don’t have gel food coloring in orange shades? Can I use liquid food coloring?
Gel food coloring is preferred because it provides vibrant color without thinning the buttercream. If you only have liquid food coloring, use it sparingly to avoid making the frosting too runny. You might need to add extra powdered sugar to maintain stiffness.
Is it possible to make this cake gluten-free?
Absolutely! Substitute the all-purpose flour with a gluten-free flour blend that is suitable for baking. Keep in mind that you may need to adjust the amounts slightly to achieve the ideal texture, and be sure the baking powder does not contain gluten.
Can I prepare parts of the cake in advance?
Yes, you can bake the cake layers a day or two ahead and keep them wrapped tightly in plastic wrap at room temperature or in the refrigerator. The buttercream can also be made a day in advance and stored covered in the fridge. Assemble closer to the celebration to keep everything fresh.
How do I clean the stencil for reuse?
After use, gently wipe the stencil with warm soapy water and pat dry. Avoid harsh scrubbing to keep the edges crisp for future cake decoration sessions. Store flat to prevent bending or warping of the design.
Final Thoughts
This Stenciled Halloween Sprinkle Cake Recipe has quickly become one of my absolute favorites because it brings such joy to all parts of the baking and sharing process. The beautiful stencil design combined with the rich, buttery layers creates a sensory experience you’ll want to revisit year after year. Don’t hesitate to let your creativity shine with colors and garnishes, and trust me—baking this cake is as fun as eating it. Give it a try and watch how your Halloween celebration lights up with every slice!