
There is something truly magical about the warm, cozy goodness of an apple dessert that feels both comforting and delightful. This Easy Apple Crisp Recipe is just that—a perfectly balanced combination of tender, cinnamon-kissed apples under a golden, buttery oat topping that crisps up beautifully in the oven. Whether you’re serving it for a family gathering or craving a sweet treat after dinner, this recipe is an effortless way to bring a slice of autumn’s warm embrace right into your kitchen anytime you like.
Ingredients You’ll Need
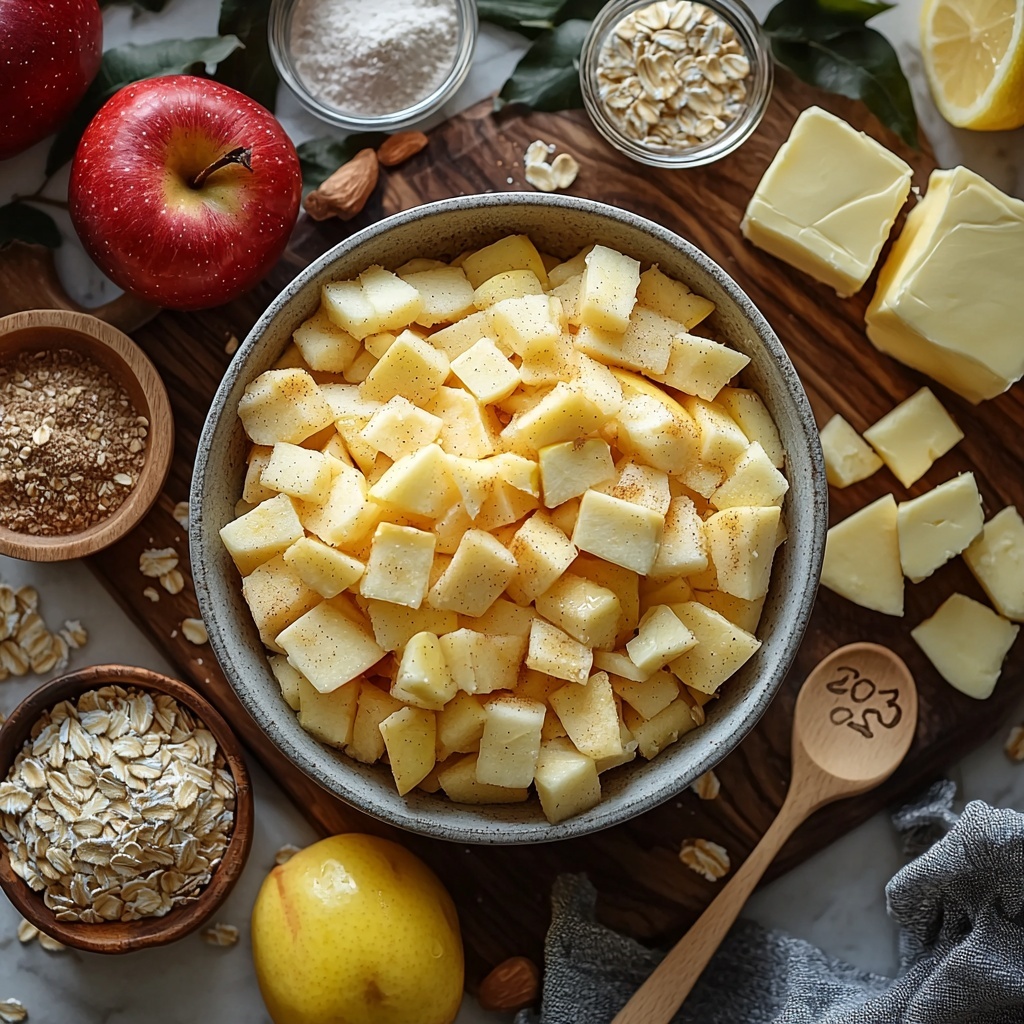
Gathering simple and pantry-friendly ingredients is the secret to making this Apple Crisp a go-to dessert. Each element plays a key role, from the tart apples to the crunchy oat topping, ensuring every bite is bursting with flavor and texture.
- 6 cups sliced apples: Choose firm apples like Granny Smith or Honeycrisp for the perfect balance of tartness and sweetness.
- 2 tablespoons lemon juice: Adds a fresh tang that keeps the apples bright and prevents browning.
- 1/2 cup brown sugar (for filling): Sweetens the fruit filling naturally with a touch of molasses flavor.
- 1 tablespoon all-purpose flour (for filling): Thickens the apple juices as the crisp bakes, ensuring a luscious filling.
- 1 teaspoon ground cinnamon (for filling): Wakes up the apples with warming spice notes.
- 3/4 cup old-fashioned oats: Forms the heart of the crunchy, crumbly topping.
- 1/2 cup all-purpose flour (for topping): Gives structure to the oat crumble, helping it hold its shape.
- 1/2 cup brown sugar (for topping): Caramelizes as it bakes, providing sweetness and a beautiful golden color.
- 1/2 teaspoon ground cinnamon (for topping): Adds subtle spice to the crisp topping.
- 1/4 teaspoon salt: Balances the sweetness and enhances the overall flavor.
- 1/2 cup unsalted butter, cold and diced: Creates the tender, buttery crumble that melts in your mouth.
How to Make Easy Apple Crisp Recipe
Step 1: Prepare Your Oven and Baking Dish
Start by preheating your oven to 350°F (175°C), and lightly grease an 8×8 or 9×9 inch baking dish. This simple step ensures your crisp doesn’t stick and bakes evenly with a golden crust all around.
Step 2: Mix the Apple Filling
In a large bowl, toss the sliced apples with lemon juice, 1/2 cup brown sugar, 1 tablespoon of flour, and 1 teaspoon cinnamon. This mixture combines tartness, sweetness, and spice, creating the foundation of your crisp that’s full of balanced flavor.
Step 3: Prepare the Crisp Topping
Using another bowl, combine the oats, 1/2 cup flour, 1/2 cup brown sugar, 1/2 teaspoon cinnamon, and a pinch of salt. Cut in the cold, diced butter using your fingers or a pastry cutter until you achieve a crumbly texture. This step is where the magic happens—the cold butter creates those signature crunchy pockets that make this crisp irresistible.
Step 4: Assemble the Apple Crisp
Spread the apple mixture evenly across the prepared baking dish. This even layer ensures every bite gets a perfect balance of tender fruit and crunchy topping.
Step 5: Add the Crumble Topping
Sprinkle the crumbly oat topping generously over the apples. Don’t be shy—it’s this layer that adds that wonderful texture contrast and deep, buttery flavor.
Step 6: Bake Until Golden and Bubbling
Place your dessert in the oven and bake for 40 to 45 minutes. You’ll know it’s ready when the topping turns a gorgeous golden brown and the filling is bubbling delightfully around the edges.
Step 7: Cool Slightly and Serve
After baking, let your apple crisp cool for a few minutes before serving. This allows the filling to set a bit so each spoonful holds together—and it makes the whole experience that much more comforting and enjoyable.
How to Serve Easy Apple Crisp Recipe
Garnishes
One of the best parts of enjoying this Easy Apple Crisp Recipe is personalizing it with your favorite garnishes. A scoop of creamy vanilla ice cream or a dollop of lightly whipped cream elevates the dish instantly, adding a cool, smooth contrast to the warm, spiced apples and crunchy topping. For an extra special touch, sprinkle a little chopped toasted pecans or a cinnamon dusting right before serving.
Side Dishes
While this apple crisp shines on its own as a dessert, it also pairs beautifully with a hot cup of coffee or a warm mug of spiced tea. For a heartier spread, consider serving it alongside a simple cheese plate featuring mild cheddar or gouda—the sweet and savory combination is simply irresistible.
Creative Ways to Present
Think beyond the baking dish! For a charming twist, scoop individual servings into small ramekins or mason jars. Layering warm apple crisp with vanilla yogurt makes for a delightful parfait presentation. Hosting a casual gathering? Try serving warm apple crisp in cinnamon sugar-coated mini tortilla bowls for both beauty and an extra crunch.
Make Ahead and Storage
Storing Leftovers
If you end up with leftovers (which is rare, but it can happen!), cover the apple crisp with foil or plastic wrap and store it in the refrigerator for up to 3 days. When you’re ready to enjoy again, you’ll still have that beautiful flavor and texture, just waiting to be warmed up.
Freezing
Planning ahead is easy with this Easy Apple Crisp Recipe because it freezes beautifully. After baking and cooling completely, cover tightly with foil or store in an airtight container and freeze for up to 3 months. When you’re ready to indulge, simply thaw overnight in the fridge and reheat to perfection.
Reheating
To bring back that just-baked goodness, reheat individual portions in the microwave or warm a larger portion in a 350°F oven for about 15 minutes until heated through and crisp on top. Adding a fresh scoop of ice cream after reheating makes it feel brand new each time.
FAQs
Can I use any type of apple for this recipe?
You absolutely can, but for the best texture and flavor, firmer apples like Granny Smith, Honeycrisp, or Fuji work best since they hold their shape well during baking and provide a nice balance of tartness and sweetness.
Is it possible to make this recipe gluten-free?
Yes! Simply substitute the all-purpose flour with a gluten-free flour blend and make sure your oats are certified gluten-free. You’ll get the same delicious crunch and flavor with no gluten involved.
Can I prepare the crisp topping in advance?
Definitely. You can mix and store the crumble topping in the fridge for a day or two before baking. Just keep the butter cold and cut it into the dry ingredients right before assembling and baking.
What can I use instead of brown sugar?
If you don’t have brown sugar on hand, white sugar combined with a teaspoon of molasses or maple syrup is a fine substitute that will still provide some of that rich, caramel flavor.
How do I know when the apple crisp is done baking?
Look for a golden brown, crispy topping and bubbly filling around the edges. The bubbling indicates that the juices have thickened and the apples are softened perfectly.
Final Thoughts
This Easy Apple Crisp Recipe is truly a kitchen classic that never loses its charm. It’s approachable, comforting, and packed with warm flavors that feel like a big hug on a plate. Once you try it, I’m sure it will become one of your favorite desserts to make again and again—perfect for cozy nights, celebrations, or whenever you need a little sweet joy in your life.
Print
Easy Apple Crisp Recipe
- Prep Time: 15 minutes
- Cook Time: 45 minutes
- Total Time: 1 hour
- Yield: 6 servings
- Category: Dessert
- Method: Baking
- Cuisine: American
Description
This Easy Apple Crisp is a comforting and classic dessert featuring tender baked apples topped with a buttery oat crumble. Perfectly spiced with cinnamon and sweetened with brown sugar, it’s a warm, satisfying treat ideal for fall or any time you crave a cozy dessert.
Ingredients
Apple Filling
- 6 cups sliced apples
- 2 tablespoons lemon juice
- 1/2 cup brown sugar
- 1 tablespoon all-purpose flour
- 1 teaspoon ground cinnamon
Crumble Topping
- 3/4 cup old-fashioned oats
- 1/2 cup all-purpose flour
- 1/2 cup brown sugar
- 1/2 teaspoon ground cinnamon
- 1/4 teaspoon salt
- 1/2 cup unsalted butter, cold and diced
Instructions
- Preheat and Prepare: Preheat your oven to 350°F (175°C) and grease an 8×8 or 9×9 inch baking dish to ensure the apple crisp doesn’t stick during baking.
- Mix Apple Filling: In a large bowl, toss the sliced apples with lemon juice, 1/2 cup brown sugar, 1 tablespoon all-purpose flour, and 1 teaspoon ground cinnamon until the apples are evenly coated. Set this mixture aside.
- Prepare Crumble Topping: In another bowl, combine the old-fashioned oats, 1/2 cup all-purpose flour, 1/2 cup brown sugar, 1/2 teaspoon ground cinnamon, and salt. Cut in the cold, diced butter using your fingers or a pastry cutter until the mixture becomes crumbly and resembles coarse crumbs.
- Assemble in Baking Dish: Spread the apple mixture evenly in the prepared baking dish, creating a uniform layer for consistent baking.
- Add Topping: Sprinkle the prepared oat crumble topping evenly over the apples, covering them completely.
- Bake: Place the dish in the preheated oven and bake for 40 to 45 minutes, until the topping turns golden brown and the filling is bubbly, indicating that the apples are tender and cooked through.
- Cool and Serve: Remove from the oven and let the apple crisp cool slightly to allow the filling to set. Serve warm, optionally accompanied by ice cream or whipped cream for extra indulgence.
Notes
- Use tart apple varieties like Granny Smith for the best balance of sweetness and acidity.
- Ensure the butter is cold when cutting into the topping to achieve a crumbly texture.
- For extra flavor, add a pinch of nutmeg or vanilla extract to the apple filling.
- Store leftovers covered in the refrigerator and reheat before serving.


