
If you have ever dreamed of baking your own bread at home, there is nothing quite like the comforting aroma and irresistible texture of the Homemade Honey-Soft Classic Bread Recipe to sweep you off your feet. This bread strikes the perfect balance between sweet honey undertones and pillowy softness, making it a staple for any kitchen. Whether you’re a seasoned bread baker or just starting out, this recipe will become your go-to, bringing warmth and joy to your table with every slice.
Ingredients You’ll Need
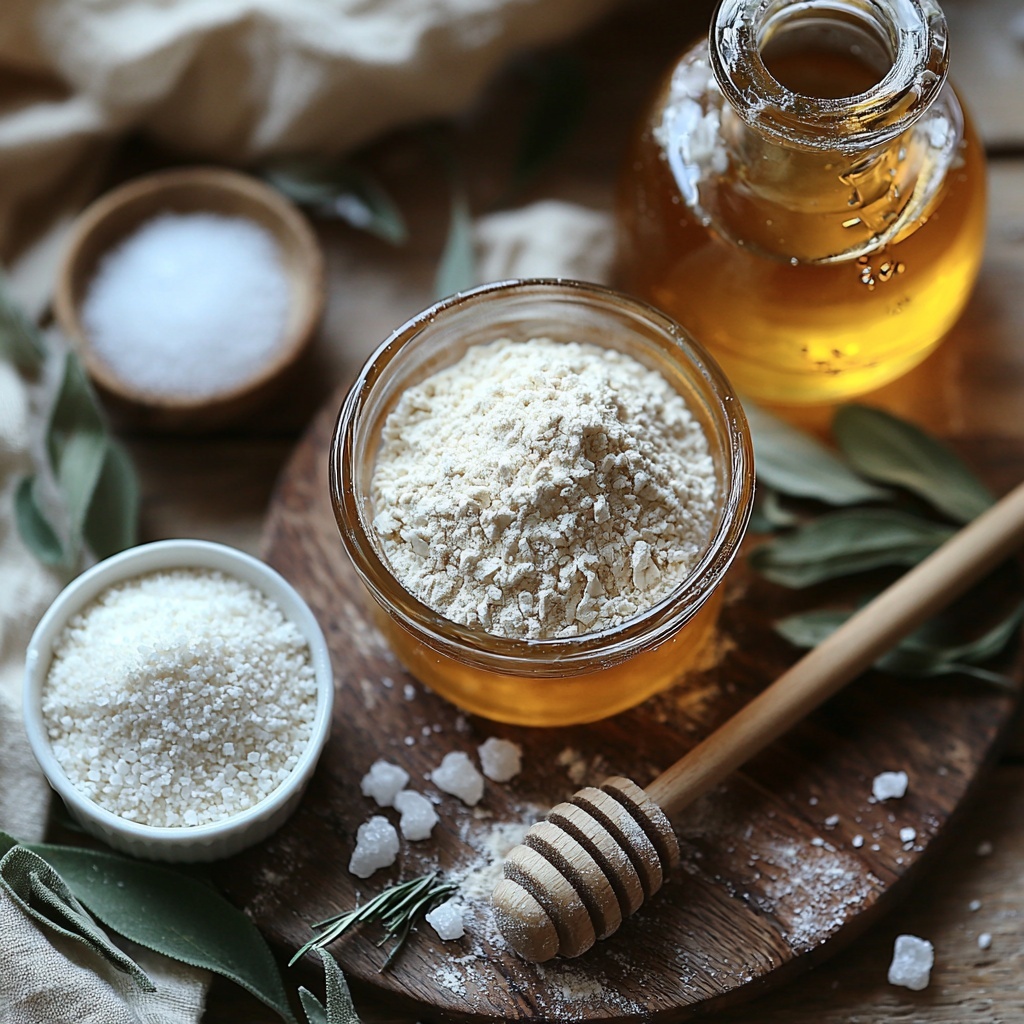
The magic of this Homemade Honey-Soft Classic Bread Recipe lies in its simplicity. Each ingredient plays a vital role in creating that soft crumb and slightly sweet flavor we all love. From yeast that gives the bread its rise to honey that adds a natural sweetness and tenderness, you’ll find that great bread starts with quality basics.
- 2 cups warm water (105-115°F): The ideal temperature to activate your yeast without killing it, ensuring a perfect rise.
- 1 tablespoon active dry yeast: The essential leavening agent that brings life and airiness to the dough.
- 1/4 cup honey or sugar: Adds gentle sweetness and helps keep the bread moist and soft for days.
- 2 teaspoons salt: Enhances flavor and balances the sweetness from the honey.
- 2 tablespoons oil (canola or vegetable): Adds richness and helps create that tender crumb we crave.
- 4 to 5 1/2 cups all-purpose flour: The foundation of your bread, offering structure and chew.
How to Make Homemade Honey-Soft Classic Bread Recipe
Step 1: Activate Your Yeast
Start by combining warm water, the tablespoon of yeast, and a tiny pinch of honey or sugar in a large bowl. Let this mixture sit for 5 to 10 minutes until it becomes foamy on top. This signals that your yeast is active and ready to do its magic.
Step 2: Combine Ingredients and Flour
Next, stir in the remaining honey or sugar, salt, oil, and three cups of all-purpose flour into your yeast mixture. Mix everything together until it is well combined. This step starts forming the dough’s base before adding more flour.
Step 3: Gradually Add More Flour
Slowly incorporate additional flour until the dough pulls away from the sides of the bowl but remains slightly sticky to the touch. This balance is important to keep your bread soft yet structured.
Step 4: Knead the Dough
Knead your dough for about 4 to 5 minutes, either by hand on a floured surface or using a stand mixer. The goal is a smooth, elastic dough that springs back gently when pressed.
Step 5: First Rise
Place your kneaded dough into an oiled bowl and cover it with a clean cloth or plastic wrap. Find a warm spot in your kitchen and let it rise until it doubles in size, usually about 1.5 hours.
Step 6: Shape and Prepare for Second Rise
Punch down your dough to release the gases, divide it into two equal portions, and shape each into a log. Place these in greased loaf pans to help them keep their form.
Step 7: Second Rise
Cover the pans again and allow the dough to rise a second time for 45 minutes to an hour. This final rise gives your bread that gorgeous soft texture and volume.
Step 8: Bake to Golden Perfection
Preheat your oven to 350°F. Bake the loaves for about 30 to 33 minutes or until the crust turns beautifully golden brown and sounds hollow when tapped.
Step 9: Cool and Enjoy
Remove your loaves from the pans and place them on a wire rack to cool completely before slicing. This prevents a gummy texture and ensures every bite is pure bliss.
How to Serve Homemade Honey-Soft Classic Bread Recipe
Garnishes
A fresh slice of this bread shines beautifully with just a dab of butter or a drizzle of honey. For an extra special touch, sprinkle some sesame seeds or oats on top before baking to add visual appeal and crunch.
Side Dishes
This bread pairs wonderfully with homemade soups, creamy cheeses, or hearty salads. Its tender crumb is perfect for soaking up stews or serving alongside a vibrant garden salad for a satisfying meal.
Creative Ways to Present
Try turning your Homemade Honey-Soft Classic Bread Recipe into fancy sandwiches or toast rounds topped with avocado, eggs, or smoked salmon. You can even hollow out the center for a bread bowl filled with warm dips or chowders—guaranteed to impress guests!
Make Ahead and Storage
Storing Leftovers
To keep your bread fresh, store it in a sealed plastic bag or airtight container at room temperature for up to three days. Avoid refrigeration as it can dry out the soft crumb you worked so hard to create.
Freezing
If you want to enjoy this Homemade Honey-Soft Classic Bread Recipe longer, slice and freeze your bread in an airtight freezer bag. This way, you can grab slices whenever you want a quick snack or to accompany your meals.
Reheating
Reheat frozen or leftover bread slices in a toaster or oven at 350°F for 5 to 10 minutes to bring back that fresh-baked softness and aroma. Warm bread makes all the difference when spreading butter or dips.
FAQs
Can I substitute honey with sugar in this bread recipe?
Absolutely! Honey adds moisture and a unique floral sweetness, but sugar works just fine if that’s what you have on hand. Just keep the quantity the same.
What is the best flour to use for this recipe?
All-purpose flour is ideal for this bread, balancing protein content for a tender yet elastic crumb. You can experiment with bread flour for a chewier texture, but all-purpose is perfect for beginners.
How do I know when the dough has risen enough?
The dough should roughly double in size and look visibly puffed. Press a finger gently into the dough; if the indentation remains, it’s ready for the next step.
Can I make this bread without a stand mixer?
Yes! Kneading by hand is a wonderful way to connect with your bread dough. Just expect to spend a few extra minutes kneading to reach the same smooth and elastic texture.
What causes bread to be dense instead of soft?
Dense bread usually means the dough didn’t rise enough or too much flour was added. Stick to the rising times and add flour gradually to maintain that perfect softness in this Homemade Honey-Soft Classic Bread Recipe.
Final Thoughts
Baking the Homemade Honey-Soft Classic Bread Recipe is truly one of those kitchen adventures that fills your home with warmth and love. The results — a tender, slightly sweet loaf that complements any meal or snack — are well worth every step. So gather your ingredients, roll up your sleeves, and enjoy the pure joy of homemade bread fresh from your own oven. You won’t regret it!
Print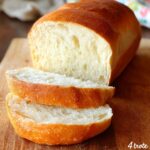
Homemade Honey-Soft Classic Bread Recipe
- Prep Time: 15 minutes
- Cook Time: 33 minutes
- Total Time: 2 hours 45 minutes
- Yield: 16 servings (2 loaves)
- Category: Bread
- Method: Baking
- Cuisine: American
Description
This Homemade Bread recipe yields soft, fluffy loaves with a slightly sweet flavor, perfect for sandwiches or toast. It uses simple pantry ingredients and requires kneading and two rises before baking to achieve a golden, tender crust and airy crumb.
Ingredients
Dry Ingredients
- 2 cups warm water (105-115°F)
- 1 tablespoon active dry yeast
- 1/4 cup honey or sugar
- 2 teaspoons salt
- 4 to 5 1/2 cups all-purpose flour
Wet Ingredients
- 2 tablespoons oil (canola or vegetable)
Instructions
- Activate Yeast: In a large bowl, combine warm water, yeast, and a pinch of honey or sugar. Let it sit for 5-10 minutes until the mixture becomes foamy, indicating the yeast is active.
- Mix Ingredients: Stir in the remaining honey or sugar, salt, oil, and three cups of flour. Mix thoroughly until the ingredients start to come together.
- Add Flour Gradually: Gradually add more flour until the dough pulls away from the sides of the bowl but remains slightly sticky to the touch.
- Knead Dough: Knead the dough for 4-5 minutes using a stand mixer with a dough hook or by hand until the dough is elastic and smooth.
- First Rise: Place the dough in an oiled bowl, cover it with a clean cloth or plastic wrap, and let it rise in a warm spot until it doubles in size, which takes about 1.5 hours.
- Punch Down & Shape: Punch down the risen dough to release air. Divide it into two equal portions, shape each into a loaf, and place them in greased loaf pans.
- Second Rise: Cover the loaf pans and let the dough rise again for 45 minutes to 1 hour until the loaves have puffed up significantly.
- Bake: Preheat your oven to 350°F (175°C). Bake the loaves for approximately 30-33 minutes, or until the crust is golden brown and the bread sounds hollow when tapped.
- Cool: Remove the bread from pans and cool on a wire rack before slicing to finish the process and prevent a gummy texture.
Notes
- Ensure the water temperature is between 105°F and 115°F to properly activate the yeast without killing it.
- Adjust the amount of flour as needed; humidity and flour brand can affect dough consistency.
- Kneading by hand may take a bit longer but is a good way to feel the dough’s texture develop.
- Rising times may vary depending on ambient temperature; a warmer environment speeds up fermentation.
- The bread keeps well for several days when stored in an airtight container and can be frozen for longer storage.


