
“`html
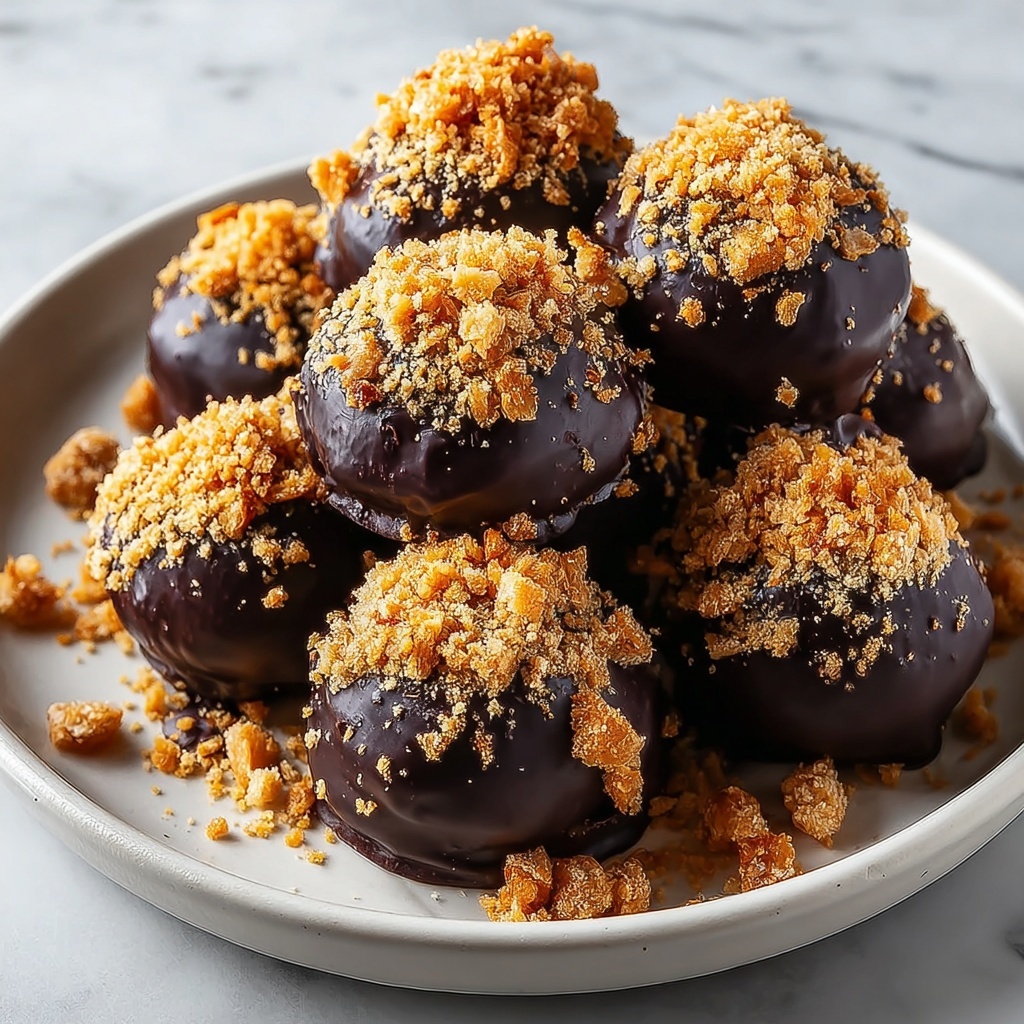
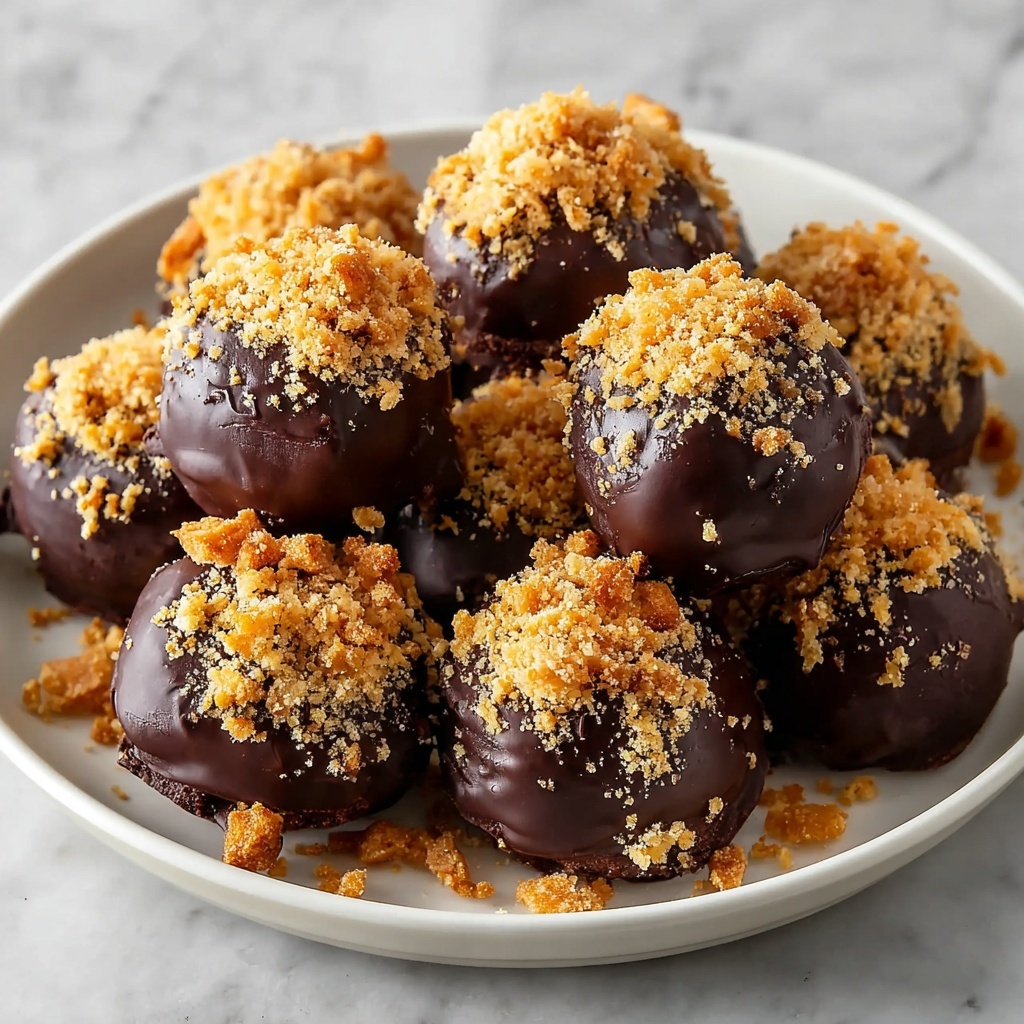
If you have a sweet tooth and crave a treat that’s both crispy and creamy, you are going to adore this Decadent Crispy Chocolate-Dipped Butterfinger Balls Recipe. Imagine delicate little bites combining the irresistible crunch of Butterfinger candy with the rich, silky peanut butter center, all enveloped in smooth milk chocolate. These delightful balls are an easy, no-bake way to impress friends or satisfy your own chocolate cravings with minimal fuss and maximum flavor. Whether you want a quick homemade dessert or a festive party snack, this recipe delivers an unforgettable combo guaranteed to make you smile after every bite.
Ingredients You’ll Need
The magic of this recipe lies in its simple yet essential ingredients. Each one plays a key role in building the perfect balance of texture and taste—from the buttery crunch to the creamy softness and the luscious chocolate coating.
- 1 cup crushed Butterfinger candy bars: Provides that iconic crispy, flaky texture and fruity peanut buttery flavor that defines the treat.
- 1 cup creamy peanut butter: Adds a smooth, rich base that binds everything together and amplifies the nutty goodness.
- 1 cup powdered sugar: Sweetens the mixture without making it gritty, giving just the right amount of sugary balance.
- 1 teaspoon vanilla extract: Introduces a warm, subtle depth that enhances all the other flavors.
- 2 cups milk chocolate chips: For that dreamy, melty coating that crisply hardens, sealing in the delicious center.
- 1 tablespoon coconut oil: Helps the chocolate melt smoothly and gives it a glossy finish once it sets.
How to Make Decadent Crispy Chocolate-Dipped Butterfinger Balls Recipe
Step 1: Gather Your Tools and Ingredients
Start by getting everything organized—crushed candy, peanut butter, powdered sugar, vanilla, plus a mixing bowl, a lined baking sheet, and a microwave-safe bowl for melting chocolate. Being prepared sets you up for a smooth and enjoyable process.
Step 2: Mix the Base
Combine the crushed Butterfinger candy bars, peanut butter, powdered sugar, and vanilla in the mixing bowl. Stir thoroughly until you have a thick mixture that holds together nicely and feels easy to shape. This is the heart of your decadent crispy chocolate-dipped Butterfinger balls recipe.
Step 3: Shape the Balls
With clean hands, roll the mixture into 1-inch diameter balls. Each one should be firm but tender enough to hold its shape. Arrange them on your parchment-lined baking sheet, giving each a little space to chill and firm up later.
Step 4: Chill to Firm Up
Pop the baking sheet into the freezer for about 30 minutes. This step is crucial because it firms up the centers, making it easier to dip them in chocolate without everything falling apart.
Step 5: Melt the Chocolate Coating
While the Butterfinger balls chill, combine the milk chocolate chips with the coconut oil in a microwave-safe bowl. Heat in 30-second bursts, stirring each time until the chocolate is perfectly smooth and glossy.
Step 6: Dip the Candy Balls in Chocolate
Remove the chilled balls from the freezer and dip each one carefully into the melted chocolate, coating them entirely. Use a fork to lift out each ball, letting the extra chocolate drip off so they don’t become overly thick.
Step 7: Add Finishing Touches
Set the chocolate-covered balls back on the lined baking sheet. For a fun twist, sprinkle crushed Butterfinger bits or a pinch of sea salt over the top before the chocolate hardens to boost both texture and flavor.
Step 8: Let the Chocolate Set
Allow the chocolate coating to harden either at room temperature or in the fridge. Once the outside is firm, your decadent crispy chocolate-dipped Butterfinger balls are ready to enjoy or safely stored for later.
How to Serve Decadent Crispy Chocolate-Dipped Butterfinger Balls Recipe
Garnishes
Enhance the look and taste by adding tiny sprinkles, crushed nuts, or a drizzle of white chocolate on top. These small touches make each bite look as tempting as it tastes.
Side Dishes
These Butterfinger balls are a treat all on their own, but pairing them with a scoop of vanilla ice cream or a fresh berry salad offers a refreshing contrast and elevates the dessert experience.
Creative Ways to Present
Try serving these little delights in colorful mini cupcake liners or arrange them artfully on a festive platter sprinkled with decorative edible flowers or cocoa powder for a stunning centerpiece at any gathering.
Make Ahead and Storage
Storing Leftovers
Store your chocolate-dipped Butterfinger balls in an airtight container in the refrigerator to keep them fresh and maintain their crisp texture. They will stay delicious for up to a week, making them a great make-ahead treat.
Freezing
If you want to enjoy these anytime, freeze them by placing the balls in a single layer on a baking sheet so they don’t stick together. Once frozen solid, transfer to a freezer-safe container. They can last for several months this way.
Reheating
To enjoy as if freshly made, take the frozen Butterfinger balls out and let them thaw in the fridge for an hour or two. Avoid microwaving as it can soften the chocolate too much and lose the signature crispness.
FAQs
Can I use crunchy peanut butter instead of creamy?
Yes, you can substitute crunchy peanut butter if you want extra texture, but creamy peanut butter helps the mixture bind more smoothly and makes the overall bite creamier.
Is there an alternative to milk chocolate chips?
Absolutely! Dark chocolate or white chocolate chips work wonderfully too depending on your preference. Just keep in mind the flavor profile will change slightly with each type.
Can I make these nut-free?
For a nut-free version, try substituting the peanut butter with sunflower seed butter or a similar seed butter. The candy crushing and chocolate dipping remain the same, creating a safe alternative without sacrificing taste.
How long do these last once made?
When stored properly in the fridge, these Butterfinger balls stay fresh for about one week. Their chocolate coating helps keep everything sealed tight, preserving the crisp texture.
What’s the best way to crush Butterfinger candy bars?
The easiest way is to place them in a sealed plastic bag and gently bash them with a rolling pin or heavy pan until you get bite-sized, flaky pieces that mix well with the peanut butter.
Final Thoughts
I cannot recommend this Decadent Crispy Chocolate-Dipped Butterfinger Balls Recipe enough if you want a quick, delicious snack that feels special but requires minimal effort. Whether you’re treating yourself or sharing with friends, these crispy, chocolatey bites bring together the perfect harmony of crunchy and creamy. Give them a try—you’ll be so glad you did!
“`
Print
Decadent Crispy Chocolate-Dipped Butterfinger Balls Recipe
- Prep Time: 0h 15m
- Cook Time: 0h 5m
- Total Time: 0h 50m
- Yield: Approximately 24 balls
- Category: Dessert
- Method: No-Cook
- Cuisine: American
Description
These Decadent Crispy Chocolate-Dipped Butterfinger Balls are a delightful treat combining crushed Butterfinger candy bars with creamy peanut butter and powdered sugar, all coated in a rich milk chocolate shell. Perfectly bite-sized and easy to make, these no-bake candies offer a crunchy texture wrapped in creamy chocolate, ideal for parties, holidays, or a sweet snack anytime.
Ingredients
Butterfinger Mixture
- 1 cup crushed Butterfinger candy bars (about 4 regular-sized bars)
- 1 cup creamy peanut butter
- 1 cup powdered sugar
- 1 teaspoon vanilla extract
Chocolate Coating
- 2 cups milk chocolate chips
- 1 tablespoon coconut oil
Instructions
- Gather Ingredients and Equipment: Begin by assembling all your ingredients and utensils: a mixing bowl, a baking sheet lined with parchment paper, and a microwave-safe bowl for melting chocolate.
- Mix Ingredients: In the mixing bowl, combine the crushed Butterfinger candy bars, creamy peanut butter, powdered sugar, and vanilla extract. Stir thoroughly until the mixture is uniform, thick, and moldable.
- Form Balls: Use your hands to shape the mixture into small balls, approximately 1 inch in diameter. Place each ball evenly spaced on the parchment-lined baking sheet.
- Freeze Balls: Transfer the baking sheet to the freezer and chill the balls for about 30 minutes. This step firms them up, making chocolate dipping easier and cleaner.
- Melt Chocolate: While the balls chill, in a microwave-safe bowl, combine milk chocolate chips and coconut oil. Microwave in 30-second intervals, stirring between each, until the chocolate is fully melted, smooth, and glossy.
- Dip Butterfinger Balls: Remove the firm Butterfinger balls from the freezer. Using a fork, dip each ball into the melted chocolate, ensuring full coverage. Lift them out to let any excess chocolate drip back into the bowl.
- Cool and Decorate: Place the chocolate-coated balls back onto the parchment-lined sheet. Optionally, sprinkle crushed Butterfinger pieces or a pinch of sea salt on top before the chocolate sets for added flavor and texture.
- Set Chocolate: Allow the chocolate to harden at room temperature, or place the tray in the refrigerator to speed up setting. Once firm, serve immediately or store the balls in an airtight container in the refrigerator for later enjoyment.
Notes
- Freezing the Butterfinger balls before dipping helps maintain their shape and prevents melting.
- If desired, substitute milk chocolate chips with dark or semi-sweet chocolate for a different flavor profile.
- Ensure the chocolate is not overheated during melting to avoid burning.
- Store these treats in an airtight container in the refrigerator to keep them fresh for up to one week.
- For extra crunch, sprinkle additional crushed Butterfinger candy on top while the chocolate is still wet.


