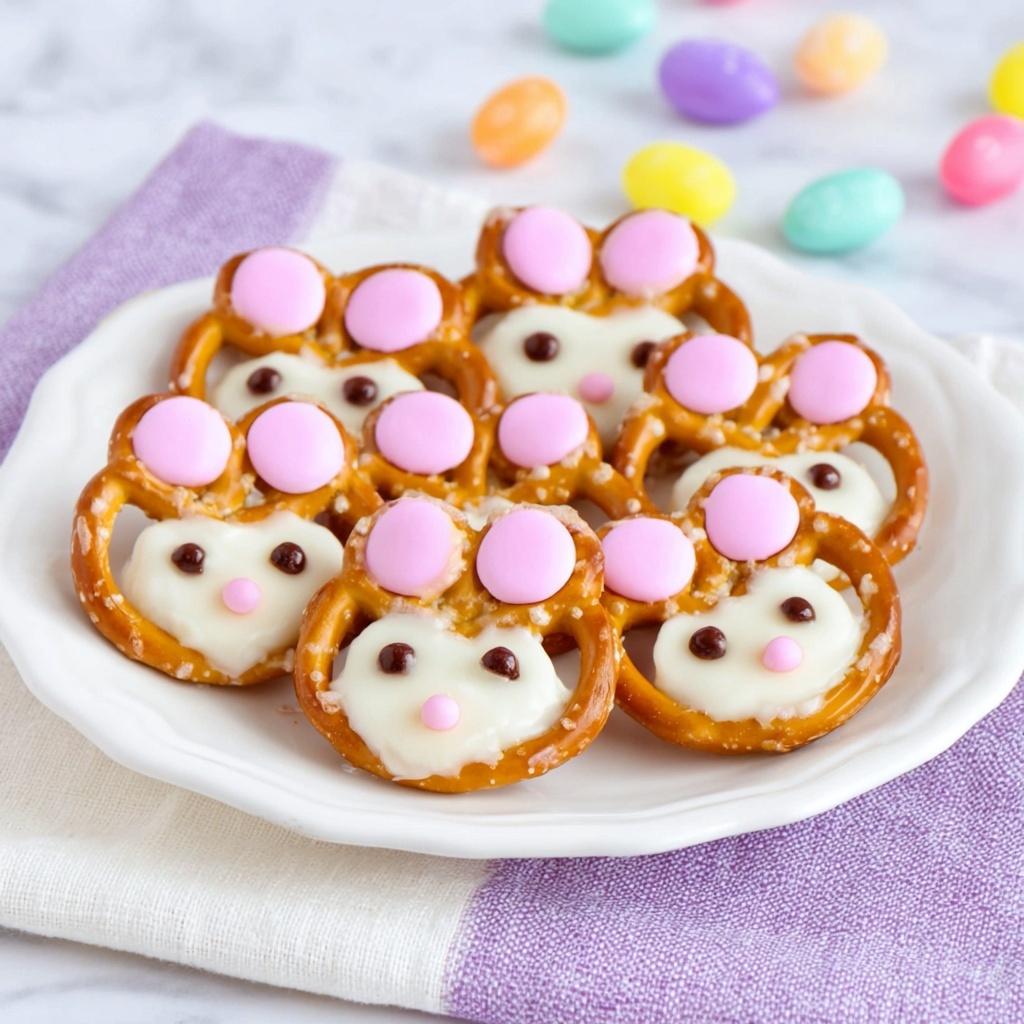
If you’re looking for a fun and delightful treat that’s as charming to look at as it is delicious to eat, this Bunny Pretzels Recipe is a total winner. These cute little snacks combine the salty crunch of pretzel twists with the sweet, creamy goodness of white chocolate, all dressed up with pink and black accents that mimic adorable bunny faces. Perfect for parties, holiday gatherings, or just a cozy afternoon snack, this recipe is simple, quick, and guaranteed to bring smiles all around.
Ingredients You’ll Need
Getting these Bunny Pretzels just right requires only a handful of ingredients, each playing a crucial role in balancing flavor, texture, and that irresistible bunny look. The salty pretzels provide crunch, the white chocolate coating adds sweetness and smoothness, while the food coloring gels allow you to create the playful details that truly make this treat pop.
- White Chocolate Almond Bark (3 squares): Melts easily and sets with a smooth finish, perfect for coating and decorating pretzels.
- Pretzel Twists (24): Choose flat ones when possible for easier decorating and a crunchy, salty base.
- Pink Food Coloring Gel: Adds a cute, soft color for bunny ears and noses that’s vivid but gentle.
- Black Food Coloring Gel: Used sparingly to create expressive bunny eyes with precise detail.
- Parchment Paper: Keeps your work surface clean and lets you lift the pretzels easily once set.
How to Make Bunny Pretzels Recipe
Step 1: Prepare and Melt
Start by laying out a large sheet of parchment paper on your counter or table—this surface will be your decorating station. Try to pick pretzel twists that are flat for easier decorating later. Next, melt your 3 squares of white chocolate almond bark in the microwave, heating in short intervals and stirring often until perfectly smooth. Arrange your pretzels evenly spaced on the parchment, ready for their sweet makeover.
Step 2: Fill the Pretzels
Using a spoon or a small spatula, carefully fill the inner spaces of each pretzel twist with the melted white chocolate. This step creates the creamy base of your bunny’s face and ears. Let the coated pretzels sit undisturbed for about 30 minutes so the chocolate can fully set and harden. This ensures your bunnies hold their shape beautifully as you move on to decorating.
Step 3: Color and Detail
Once the chocolate on the pretzels has set, flip each pretzel over. Pour about 3 tablespoons of your leftover white chocolate into one small dish and 2 tablespoons into another. Add pink food coloring gel to the larger portion and black gel to the smaller, mixing each carefully until the colors are vibrant. Using a toothpick, dot two small black eyes on the lower spaces of each pretzel—these are your bunny’s twinkly eyes.
Step 4: Add the Nose and Ears
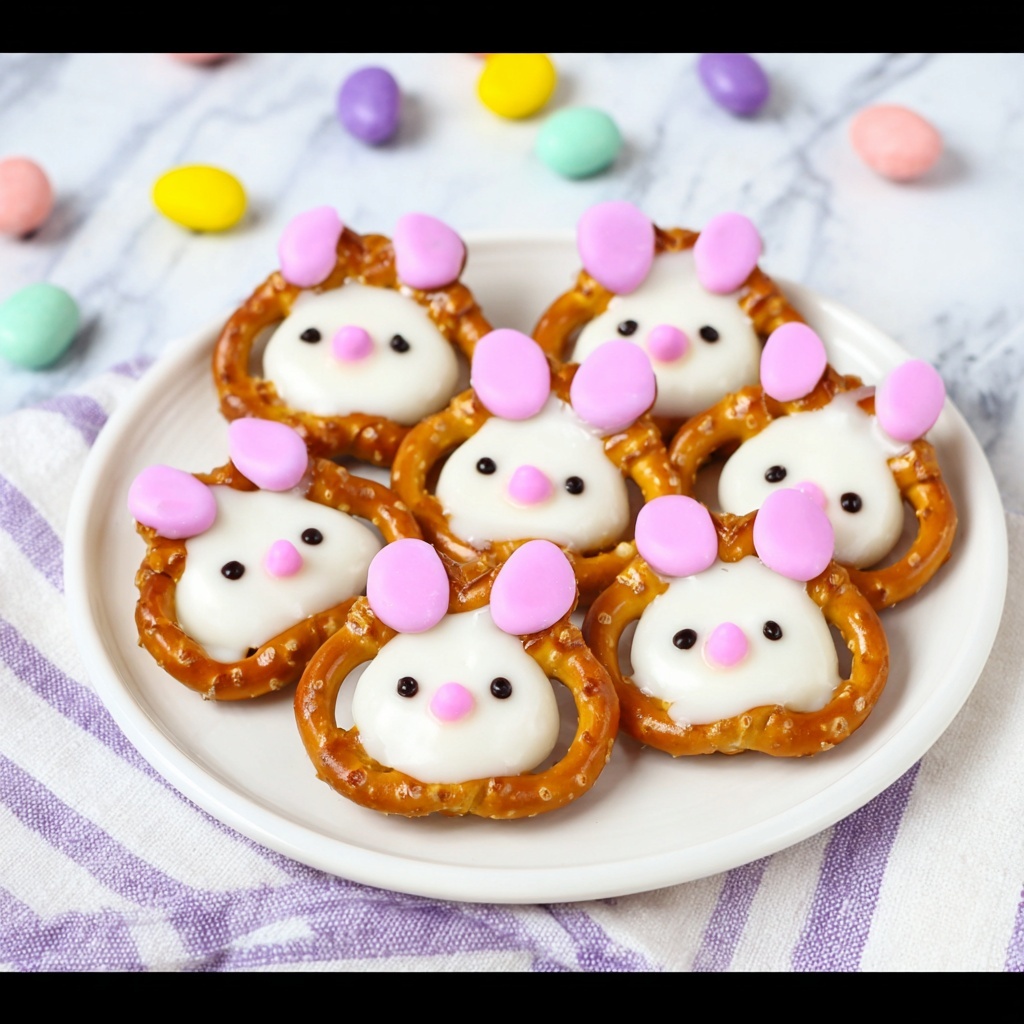
With a clean toothpick, dab a touch of the pink chocolate onto each bunny’s nose space, then fill the upper two inner spaces for cute bunny ears. The contrast of the pink against the white chocolate-covered pretzel makes the ears and nose pop with personality. Allow these decorated bunnies to sit for another 30 minutes so all the chocolate colors set firmly. Then your Bunny Pretzels Recipe is ready to brighten any occasion.
How to Serve Bunny Pretzels Recipe
Garnishes
While these bunny pretzels shine beautifully on their own, you can sprinkle a little colorful edible glitter or powdered sugar around the serving plate to add a touch of whimsy. For a festive look, fresh mint leaves or small edible flowers lend a natural freshness and subtle aroma that complements the sweet and salty flavors perfectly.
Side Dishes
When serving Bunny Pretzels, think about pairing them with light, complementary bites. Fresh fruit slices—think strawberries or apple wedges—provide juicy bursts that contrast the crunchy pretzels. A cool milkshake or a cup of hot cocoa can also turn this snack into an indulgent little treat time everyone will adore.
Creative Ways to Present
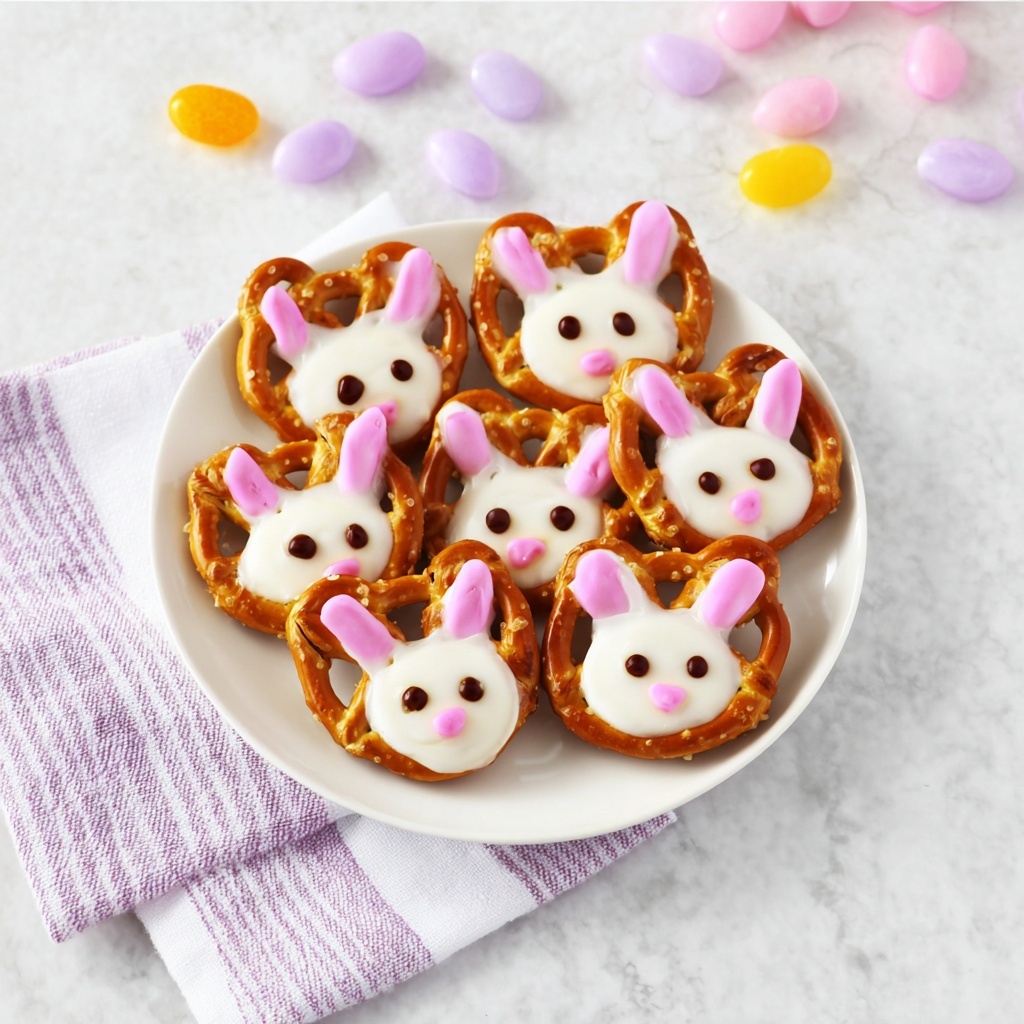
For a party or holiday spread, arrange your Bunny Pretzels Recipe on a colorful platter in clusters, making a “bunny garden” complete with carrot-shaped veggies or orange-colored candy-coated chocolates. Wrapping each pretzel individually in cellophane with a tied ribbon makes for charming favors that guests will treasure and remember.
Make Ahead and Storage
Storing Leftovers
If you have any leftover bunny pretzels, store them in an airtight container at room temperature to preserve their crunch and freshness. Avoid refrigeration because it can cause chocolate to bloom and change texture. Stored properly, they should stay delightful for up to 3 days.
Freezing
Freezing Bunny Pretzels is possible but not always ideal due to the delicate chocolate decorations. If you want to freeze them, place the pretzels in a single layer on a parchment-lined tray until frozen solid, then transfer to a sealed freezer bag. Thaw carefully at room temperature to keep the chocolate from sweating or cracking.
Reheating
Since these are no-bake treats with set chocolate, reheating isn’t necessary. If the chocolate seems less crisp after storage, simply let the pretzels come to room temperature before enjoying. Their charm and delicious flavor are best savored fresh or within a few days.
FAQs
Can I use other types of chocolate instead of white chocolate almond bark?
Definitely! While white chocolate almond bark melts smoothly and sets nicely, you can substitute with regular white chocolate chips or bars. Just be mindful that some chocolates require tempering for a perfect finish, which can be a bit trickier.
Is it necessary to use food coloring gel instead of liquid food coloring?
Food coloring gel is best because it’s more concentrated, allowing you to achieve vivid colors without thinning out the chocolate. Liquid colors can make the chocolate runny and harder to set.
Can this recipe be made with gluten-free pretzels?
Yes! Using gluten-free pretzels works beautifully. Just make sure they have a similar twist shape and are sturdy enough to hold the chocolate for the best bunny effect.
How long does the decorating step usually take?
The actual decorating with colored chocolate takes about 15-20 minutes for 24 pretzels. It’s a fun and relaxing step, especially if you enlist some help or use the time to chat and enjoy the creative process.
What’s the best way to make sure the chocolate sets evenly?
A cool, dry environment helps the chocolate set faster and more evenly. Avoid humid spaces and don’t stack the pretzels until the chocolate is completely firm to prevent smudging.
Final Thoughts
If you love mixing sweet and salty flavors and want a snack that’s both adorable and easy to make, you absolutely must try this Bunny Pretzels Recipe. It’s a wonderful project to share with kids, friends, or anyone who enjoys a touch of whimsy with their treats. Once you see how simple it is to create these charming little bunnies, they’ll quickly become a favorite in your recipe rotation. Happy baking and decorating!
Print
Bunny Pretzels Recipe
- Prep Time: 10 minutes
- Cook Time: 0 minutes
- Total Time: 40 minutes
- Yield: 24 pretzels
- Category: Dessert
- Method: No-Cook
- Cuisine: American
Description
These adorable Bunny Pretzels are a simple and fun no-bake treat, perfect for Easter or springtime celebrations. Pretzel twists are filled and decorated with melted white chocolate almond bark tinted with pink and black food coloring to create cute bunny faces with ears, eyes, and noses. They are quick to prepare and set with no cooking required.
Ingredients
Chocolate Coating
- 3 squares White Chocolate Almond Bark (melted)
Base
- 24 Pretzel Twists
Decorations
- Food Coloring Gel (Pink and Black)
Instructions
- Prepare Work Surface and Chocolate: Lay out a large piece of parchment paper on your counter or table to place the pretzels for decorating. Try to select flat pretzels from the bag to make shaping easier. Melt 3 squares of white chocolate almond bark in the microwave until smooth and fluid. Arrange the pretzel twists in a single layer on the parchment paper.
- Fill Pretzel Spaces with White Chocolate: Use the melted white chocolate to fill the open spaces of each pretzel twist. Allow the chocolate to set and dry completely for about 30 minutes. After setting, flip each pretzel over gently.
- Prepare Colored Chocolate for Decorating: From the remaining melted white chocolate, measure out about 3 tablespoons into a small dish and add pink food coloring gel to create pink tinted chocolate. In another small dish, place 2 tablespoons of the white chocolate and mix in black food coloring gel to make black tinted chocolate.
- Decorate Bunny Features: Using a toothpick, dip into the black tinted chocolate and add two small black dots in the lower space of each pretzel to represent the bunny’s eyes. Next, use the pink tinted chocolate with a toothpick to add a small dot in the center lower part of the pretzel for the bunny nose. Then decorate the upper two spaces of the pretzel with pink chocolate to form bunny ears.
- Set and Serve: Let the decorated pretzels sit for another 30 minutes to allow the colored chocolate decorations to fully dry and set. Once set, the Bunny Pretzels are ready to serve and enjoy!
Notes
- Use flat pretzels for easier and cleaner decorating.
- If almond bark is not available, white melting wafers or white chocolate chips can be used as substitutes.
- Work quickly when coloring and decorating as the white chocolate can harden fast.
- Store finished pretzels in an airtight container at room temperature for up to 3 days.
- For more vibrant colors, add the food coloring gel gradually until desired shade is achieved.
